Tuesday, March 4, 2014

Chex Mix Cupcakes with Chocolate Buttercream

I love getting requests to bake cupcakes for a friend's birthday.  It's fun to try and figure out which kind they might like best.  This friend always gives out tins of homemade Chex Mix for the holidays, so I thought it would be fun to incorporate that into a cupcake.  And who doesn't love a salty-sweet combination?


Before I started baking, I wanted to make sure I was on track with the flavor profile so I tried a handful (or five) of Chex Mix with some chocolate chips.  Um... yes.  That ought to work just fine, but maybe I ought to try a few more handfuls, just to make sure?


Kaylee was also interested in a treat... (don't worry, she got one that was more salmon inspired than salty-sweet inspired.)


They were a huge hit at work!  Seriously, nothing makes me happier than brightening people's day with a sweet treat.


Chex Mix Cupcakes
(adapted from  Cupcake Project)
Makes 16 cupcakes

1 c. sugar
1 c. all-purpose flour
1 c. food-processed Chex Mix
1/2 tsp. baking soda
1 1/2 tsp baking powder
1/2 c. unsalted butter, room temperature
2 large eggs
1 c. milk

Preheat oven to 350 degrees F.  In a medium-sized bowl, mix sugar, flour, ground Chex Mix, baking soda, baking powder, and butter until combined.  Mix in egg.  Mix in milk, a little at a time.

Fill cupcake liners 3/4 full.  Bake for 20 minutes or until a toothpick inserted into the center of a cupcake comes out clean.  Let cupcakes cool in cupcake tin for a few minutes.  Then remove to a cooling rack, and let cool completely.


Chocolate Buttercream Frosting (vegan)
(from Vegan Cupcakes Take Over the World)
Makes enough for 2 dozen cupcakes

1/4 c. margarine, softened
1/4 c. shortening
1/2 c. unsweetened cocoa powder (sifted if there are clumps)
2 1/2 c. powdered sugar, sifted
3 Tbsp soymilk
1 1/2 tsp vanilla extract

Cream together the margarine and the shortening until well combined.  Add the cocoa powder and incorporate well.  Add the powdered sugar in about 1/2 cup batches and beat well, adding a little splash of soymilk after each addition.  When all ingredients have been well incorporated, add the vanilla and beat until light and fluffy (about 3 minutes with a hand mixer, 7 minutes if mixing with a fork).

To finish cupcakes:
Sea salt
Mini chocolate chips
Chex Mix

Pipe frosting on top of cooled cupcakes.  Top with sea salt, mini chocolate chips, and a few Chex Mix.

To note, top off with Chex Mix no more than a few hours before serving.  More than that and the Chex Mix gets soggy, and nobody wants that!

Enjoy!

Sunday, March 2, 2014

Zucchini Bread Overnight Crockpot Porridge

Another end of a weekend - sad.  We should focus on starting out the week right with a warm, nutritious, and tasty breakfast!


After making Carrot Cake inspired porridge in December, I was curious to try out another vegetable that often gets tossed into dessert-y situations - zucchini.


I grated the zucchini into two 'sizes,' just for fun, but that's not necessary.  Go with a smaller size if you're trying to truly sneak it in, otherwise a standard size for those not afraid of a little green in their breakfast!


Just like the raisins really finished off the Carrot Cake Porridge, craisins suited this porridge perfectly.  And of course, some chopped walnuts.  Or.... in my case, crushed walnuts.  Walnuts + Ziploc bag + jar bottom = perfectly crushed walnuts.  Seriously, it's WAY easier and tidier than chopping them with a knife and having some skitter away on the countertop or find their way onto the floor.


Another grate usage of zucchini! (Get it... grate?? Grated zucchini??)  Sorry, I'll show myself out... :-)

Zucchini Bread Overnight Crockpot Porridge
Makes 6 servings

1/2 cup steel-cut oats
1/2 cup whole oat groats (found in bulk bins in Whole Foods, otherwise just more steel-cut oats)
1/2 cup short-grain brown rice (or pearled barley or farro)
2 Tbsp wheat germ
2 Tbsp flax seeds, ground
1/4 cup brown sugar
2 medium zucchini, grated (~3 cups)
2 tsp cinnamon
1 tsp vanilla
Pinch of salt
5 1/2 cups water

For toppings:
Chopped walnuts
Craisins
Brown sugar or maple syrup to taste

Before going to bed, prepare your porridge.  Place a Slow Cooker Liner in your crockpot (Reynolds makes them, by the Ziploc bags).  It's a necessary item for crockpot usage, in my opinion, particularly for overnight porridge!

In your lined crockpot, pour in your steel-cut oats, brown rice, groats, wheat germ, flax seeds, zucchini, cinnamon, salt, vanilla, brown sugar and water.  Stir.  Cover and set your crockpot to low and cook overnight.

In the morning, stir the porridge, and add in at least 1/2 cup craisins.  Top off your bowl with milk of choice (if desired), chopped nuts and sweetener.  Enjoy!

Tuesday, February 25, 2014

Lazy (and Amazing) Pizza Dough

We make a lot of homemade pizza, but we've never had a good from-scratch dough for the crust.  I just don't like having to work the dough for awhile and letting it rise, etc, etc.  Ugh, too long to wait and it just doesn't appeal to me.


Well, thanks to Smitten Kitchen (love that blog), we now have the only pizza dough recipe we need!  Why is it so wonderful, you ask?  You barely have to do anything.  Mix together the ingredients.  Let it sit overnight/all day.  No kneading at all, just pat it in the pan and you've got a chewy, crispy, tasty pizza crust.  Could you ask for anything easier?


It starts simply enough, with the usual suspects: flour, yeast, salt, and water.


Cover, and let rise overnight and/or all day.


Dump it out on a floured mat/board.  It will be very soft - don't worry, that's perfect.  Dust it lightly with flour, cut it in half to create two balls.


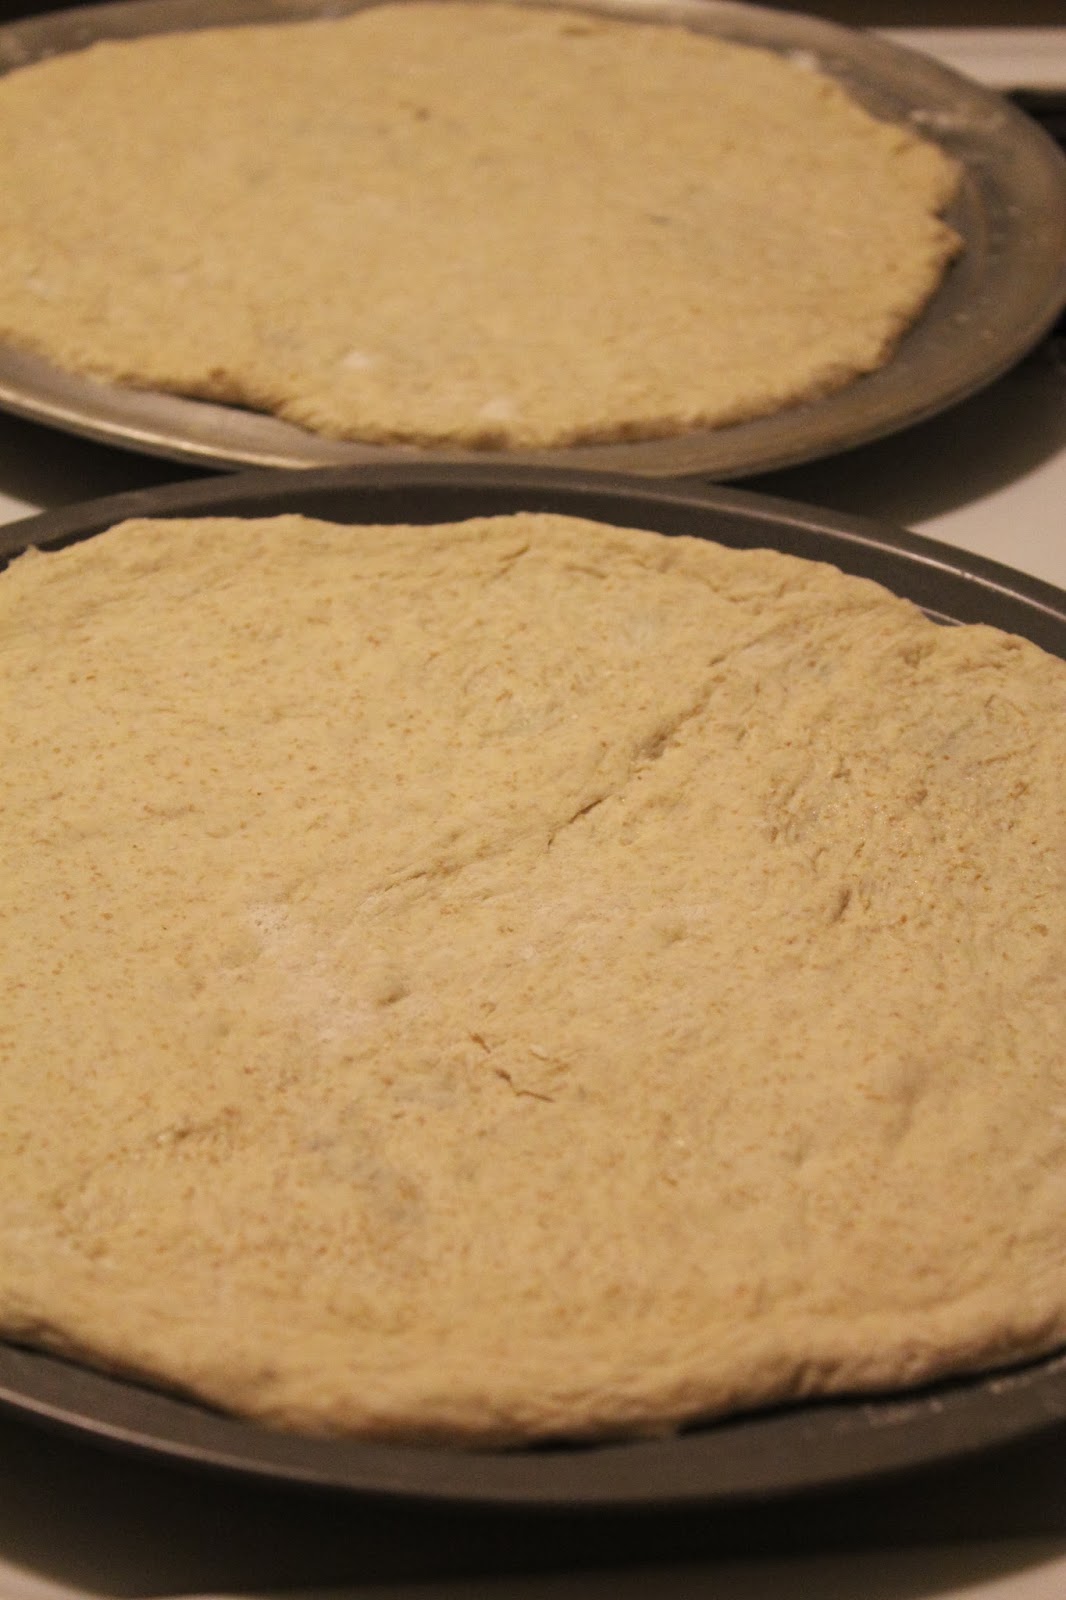
Gently pat/stretch it into two pans.


Top with your favorites, bake as directed, and then you have an amazing pizza!


My veggie-licious vegan pizza on the left and the husband's traditional sausage, green pepper and onion on the right.  This crust works perfectly for any pizza!

If you need a topping idea, here's one for Shaved Asparagus Pizza and Balsamic Roasted Vegetable Pizza (this one is my go-to with a pesto base).


Lazy Pizza Dough
(from Smitten Kitchen)
Makes 2 medium pizza crusts

Options:
1) Overnight Dough Schedule: Begin between 8 and 9 p.m the evening before for dinner between 6 to 8 p.m. (approx. 22-hour dough)

2) All-Day Dough Schedule: Begin between 6 and 8 a.m that day for dinner between 6 to 8 p.m. (approx. 12-hour dough)

3) Part-Day Dough Schedule: Begin around noon that day for dinner between 6 to 8 p.m. (approx. 6-hour dough)

Ingredients:
3 cups (375 grams) all-purpose flour (bread flour works too)
Slightly heaped 1/8, 1/4 or 1/2 teaspoon active dry yeast (for Overnight, All-Day, or Part-Day Schedules respectively, above)
1 1/2 teaspoons sea or kosher salt
1 1/4 cup water, plus an additional tablespoon or two if needed (updated)

In a very large bowl, mix all ingredients with a spoon. The dough will be craggy and rough; this is fine, but if it feels excessively so, add another spoonful or even two of water.  Cover bowl with plastic and keep at room temperature for approximately 22 (for Overnight schedule), 12 (for All-Day schedule) or 6 (for Part-Day schedule) hours, or until the dough has more than doubled. This takes longer in a chilly room and less in a very warm one, but don’t fret too much over this, as the dough is generally forgiving of a loosened schedule.

Prepare pizza pan with a very light, thin coat of olive oil or a nonstick cooking spray. Heat oven to its highest temperature, usually around 500 degrees F.  I know it seems high, but I promise it's fine!

Flour your counter very well. Scrape dough out of bowl onto floured counter; in the time it has risen it should change from that craggy rough ball to something very loose, soft, sticky and stretchy. Flour the top of the dough, and divide dough in half (or more pieces, if you’re making smaller pizzas). Form them into ball-like shapes. Grab first round with floured hands and let the loose, soft dough stretch and fall away from your hands a few times before landing the dough on your prepared baking sheet/paddle. Use floured fingers to press and nudge dough into a roughly round or rectangular shape. Add desired fixings and bake pizza for 10 to 15 minutes, rotating if it’s baking unevenly, until the top is blistered and the crust is golden. Repeat with remaining dough.

Whole wheat variation: Feel free to replace up to half the flour with whole wheat without altering any other ingredients.

Enjoy!

Sunday, February 23, 2014

Gingerbread Overnight Crockpot Porridge

It seems Polar Vortex Version 3.0 is on the way across the nation, so we need all the warming foods we can get!  (I will admit that our winter weather out here in the Pacific Northwest is nowhere near the nastiness that the rest of you are enduring.)  So let me offer you an amazing breakfast!  After the Gingerbread Waffles in December, I thought I'd translate that flavor into my favorite breakfast of overnight porridge.


A decadent tasting breakfast if there ever was one.  Yet it has all sorts of healthy things in it - bonus!


Overnight porridge like this has become my daily breakfast, and it hasn't gotten old since there are so many flavor options!  Like I've said before, it's mostly been apple-cinnamon.  But other favorites are zucchini-bread and carrot cake (great way to sneak in veggies in the morning).  We've also tried banana bread, pumpkin pie, peach-blueberry, and strawberry-banana.


Any other ideas on flavors we should try??  I'm open to suggestions.  :-)


Want another similar recipe?  Here's one for Overnight Crockpot Carrot Cake Porridge.


Gingerbread Overnight Porridge
Makes ~ 6 servings

1/2 cup steel-cut oats
1/2 cup whole oat groats (found in Whole Foods bulk bin, or just add more steel-cut oats)
1/2 cup short-grain brown rice (barley or farro work here too)
2 Tbsp ground flaxseed
2 tsp ground ginger
1 tsp cinnamon
½ tsp nutmeg
Pinch salt
¼ cup molasses
1 cup pumpkin
2 Tbsp maple syrup
1 tsp vanilla extract
~5 cups water

To top off:
Milk of choice (if desired)
Chopped walnuts or pecans
Brown sugar/maple syrup to taste

Before going to bed, prepare your porridge.  Place a Slow Cooker Liner in your crockpot (Reynolds makes them, by the Ziploc bags).  If you don't want to spend an eternity scrubbing your crockpot - use one of these!  Trust me.  They're amazing.

In your lined crockpot, pour in your ingredients.  Stir.  Cover and set your crockpot to low and cook overnight.

In the morning, stir the porridge before serving.  Top off your bowl with milk of choice, chopped nuts and sweetener.  Enjoy!

Saturday, February 22, 2014

Kettle Corn Cupcakes

The Oscars are coming up in just over a week, and if you're going to a party, this would be a perfect treat to contribute!  Or make them for yourself and enjoy them at a party of one.  Or for any movie night... Really, any excuse will do.

After snacking on some kettle corn one day, I thought it might be an interesting flavor to try in a cupcake.  Well, it turned out to be an amazing flavor to try in a cupcake!  I've made them a few times now, and each time people tell me how tasty the salty-sweet flavor is.


Surprisingly, I didn't find an exact cupcake recipe already in existence.  I wasn't looking for caramel corn, or cupcakes topped with marshmallows made to look like popcorn.  But I found a cupcake recipe that worked well, and I played around with the frosting and toppings to find the perfect balance.


To top off this popcorn-y cupcake, I used a simple vanilla buttercream, sprinkled on some chunky sea salt, and then topped it off with some store-bought kettle corn.  (If I were hardcore, I would have made the kettle corn myself.  But alas, I am not.)   The chunky sea salt is what really ties it all together by adding the perfect amount of saltiness to the buttery, sweet cupcake.


A creative cupcake that is salty-sweet perfection - give this a try!  Your friends...family...strangers will thank you.

Kettle Corn Cupcakes
(from Little Ivy Cakes)
Makes 24 cupcakes

1 1/2 cup all purpose flour
1 cup popcorn flour (use air-popped popcorn, and blend in a Vitamix until it's a flour)
3 tsp. baking powder
1/2 tsp salt
1 1/2 cups sugar
1 1/2 sticks unsalted butter, room temp is best
1/4 cup pureed cream corn
2 eggs, room temp
2 egg whites, room temp
1 tbs vanilla extract
1 cup milk

Preheat oven to 350F and line muffin pans with cupcake liners.  In a medium bowl, whisk both flours, baking powder, and salt.

In a large mixing bowl, cream butter and sugar until a pale color and majorly fluffified in your stand mixer (3 minutes?)  On a low speed, add purred creamed corn, vanilla extract, and eggs one at a time.

Alternate adding half the flour mixture, then half the milk mixture in two additions. Scrape down sides of bowl and mix well but don't over beat.  Pour batter into cupcake liners a little more than three-fourths full.

Bake about 15 minutes until cupcakes are golden brown and when gently pressed with fingers, springs back.   Remove from oven, and let them cool in the pan for a few minutes before removing them from the pans and transferring them to a cooling rack.


Vanilla Frosting - You can use your favorite recipe, but I used this vegan version just to try it out.
(from Vegan Cupcakes Take Over the World)
1/2 cup nonhydrogenated shortening
1/2 cup nonhydrogenated margarine (I used Earth Balance)
3 1/2 cups confectioner's sugar, sifted if clumpy
1 1/2 tsp vanilla extract
1/4 plain soy milk

Beat shortening and margarine together until well combined and fluffy.  Add the sugar and beat for about 3 more minutes.  Add the vanilla and soy milk, beat for 5 to 7 minutes, or until fluffy.  It seems like a long time, but it really makes a difference.  You'll see how fluffy it gets!

  
To finish
After piping or spreading some vanilla buttercream onto the cooled cupcake, sprinkle on some chunky sea salt.  Top with store-bought or homemade kettle corn.

Dig in, and enjoy!

Wednesday, February 12, 2014

Sinfully Wholesome Waffles (Vegan)

I've made these twice in four days.  Umm... yeah, they're that good.  Great for an indulgent Sunday morning breakfast, and equally fantastic for a Wednesday night dinner after a less than stellar day. 


And, since there are all sorts of wholesome things in these, you can feel good about eating them.  Oats, wheat germ, flaxseeds, blueberries, and hardly any oil or sugar.  Granted, they are perfect with a bit of fresh fruit and maple syrup, but it's not a standard sugar bomb of a breakfast!  


Also, you can just pop the leftovers into the toaster, and they're just as good as the day before. Win!


This recipe is from my favorite new cookbook - Isa Does It.  I have to say, I love all of her cookbooks and this one is fantastic.  Everything we've tried has been amazing!


These are going to be my go-to breakfast for guests.  When shall we expect you?

Sinfully Wholesome Waffles
(from  Isa Does It)
Makes eight 6-inch waffles

2 cups almond milk (or your favorite non-dairy milk)
1 Tbsp apple cider vinegar
1 3/4 cups whole-wheat pastry flour (all-purpose flour works, too)
1 Tbsp baking powder
1/2 tsp salt
2 Tbsp ground flaxseed
1/2 cup water
3 Tbsp olive oil
3 Tbsp pure maple syrup
1 tsp vanilla extract
1/2 cup rolled oats
1/4 cup wheat germ

If using:
1 cup fresh blueberries

For serving:
Fresh berries
Pure maple syrup

In a medium bowl, combine the milk and apple cider vinegar.  Set aside to let curdle.

In the meantime, in a large bowl, combine the flour, baking powder, and salt.

Add the ground flaxseed to the milk and mix vigorously until frothy, 30 seconds to 1 minute.  Add the mixture to the flour along with the water, olive oil, maple syrup, and vanilla.  Mix with a wooden spoon until mostly combined, and then fold in the oats, wheat germ, and blueberries (if using.)

Preheat a waffle iron and let the batter rest.  Cook the waffles according to your waffle-iron directions, spraying or brushing the waffle iron with oil between each waffle.  Serve with fresh berries and maple syrup.

Enjoy!
Sunday, February 9, 2014

PBR Cupcakes (Vegan)

Okay, so... we've been eating a lot of great food in the past month.  Lots of cooking and trying new things and enjoying them all.  Apparently I've been too busy eating it all to blog about it.  <cringe>  Oops.  I've got some good stuff coming your way - no worries!


The Superbowl last weekend was great fun, and it's always a great excuse to whip up good party food.  Our friends always throw a great party and this year was extra awesome because of the Seahawks (Go Hawks!)  For their party I always bake a boozy cupcake.  2 years ago it was an Irish Car Bomb cupcake and last year it was a Hefeweizen cupcake.  This year I gave a nod to the hipsters in Seattle with a vegan PBR Cupcake.


It was great!  I must say, after 3 years of doing this sort of thing, beer is great in cupcakes.  I don't like PBR generally, but it was very tasty in this application.  It kept the cupcake very moist and had a delicate crumb.  Also, I kept getting asked if there was banana in it (no), so apparently PBR has banana undertones?  Who knew?


For the frosting I used my standby vegan vanilla frosting and it worked perfectly with it.  And for the decoration, what else but blue and green sprinkles for the Seahawks?


Like the Hefeweizen cupcake, this one would also be great in the summer.  So keep it in your back pocket for anytime you need a fun cupcake!


PBR Cupcakes (Vegan)
(from the Cupcake Project)
Makes 10 cupcakes

1 cup PBR (Pabst Blue Ribbon)
1 tsp apple cider vinegar
3/4 cup light brown sugar
1/3 cup canola oil
1 1/3 cup all-purpose flour
3/4 tsp baking soda
1/2 tsp baking powder

Preheat oven to 350 degrees.  In a medium-sized bowl, whisk together PBR, apple cider vinegar, brown sugar, and canola oil until slightly frothy.

Mix in the dry ingredients until just combined.  Line cupcake pan with liners, and fill about 3/4 full.  Bake for 20 minutes or until cupcakes bounce back when lightly touched.  Remove from oven and let cool in pan for a few minutes.  Remove cupcakes from pan to a cooling rack and let cool completely.

Fluffy Vanilla Frosting (Vegan)
(from Vegan Cupcakes Take Over the World)
One batch makes enough for ~ 2 dozen cupcakes

1/2 cup nonhydrogenated shortening
1/2 cup nonhydrogenated margarine (I used Earth Balance)
3 1/2 cups confectioner's sugar, sifted if clumpy
1 1/2 tsp vanilla extract
1/4 plain soy milk

Beat shortening and margarine together until well combined and fluffy.  Add the sugar and beat for about 3 more minutes.  Add the vanilla and soy milk, beat for 5 to 7 minutes, or until fluffy.  It seems like a long time, but it really makes a difference.  You'll see how fluffy it gets!

Pipe frosting onto cooled cupcakes and top with favorite sprinkles, if desired.

Enjoy!
  • 1 cup PBR
  • 1 teaspoon apple cider vinegar
  • 3/4 cup light brown sugar
  • 1/3 cup canola oil
  • 1 1/3 cups all-purpose flour
  • 3/4 teaspoon baking soda
  • 1/2 teaspoon baking powder

  • Read more at http://www.cupcakeproject.com/2012/10/hipster-vegan-cupcakes-pbr.html#6MHWvjAX8TFZZDPZ.99
    • 1 cup PBR
    • 1 teaspoon apple cider vinegar
    • 3/4 cup light brown sugar
    • 1/3 cup canola oil
    • 1 1/3 cups all-purpose flour
    • 3/4 teaspoon baking soda
    • 1/2 teaspoon baking powder
    • vegan frosting (get the recipe in my vegan frosting post)
    Instructions
    1. Preheat oven to 350 F.
    2. In a medium-sized bowl, whisk together PBR, apple cider vinegar, sugar and oil until slightly frothy.
    3. Mix in the flour, baking soda, and baking powder until just combined.
    4. Bake for 20 minutes or until cupcakes bounce back when lightly touched.
    5. When cool, frost with vegan buttercream.

    Read more at http://www.cupcakeproject.com/2012/10/hipster-vegan-cupcakes-pbr.html#6MHWvjAX8TFZZDPZ.99
    • 1 cup PBR
    • 1 teaspoon apple cider vinegar
    • 3/4 cup light brown sugar
    • 1/3 cup canola oil
    • 1 1/3 cups all-purpose flour
    • 3/4 teaspoon baking soda
    • 1/2 teaspoon baking powder
    • vegan frosting (get the recipe in my vegan frosting post)
    Instructions
    1. Preheat oven to 350 F.
    2. In a medium-sized bowl, whisk together PBR, apple cider vinegar, sugar and oil until slightly frothy.
    3. Mix in the flour, baking soda, and baking powder until just combined.
    4. Bake for 20 minutes or until cupcakes bounce back when lightly touched.
    5. When cool, frost with vegan buttercream.

    Read more at http://www.cupcakeproject.com/2012/10/hipster-vegan-cupcakes-pbr.html#6MHWvjAX8TFZZDPZ.99
    • 1 cup PBR
    • 1 teaspoon apple cider vinegar
    • 3/4 cup light brown sugar
    • 1/3 cup canola oil
    • 1 1/3 cups all-purpose flour
    • 3/4 teaspoon baking soda
    • 1/2 teaspoon baking powder
    • vegan frosting (get the recipe in my vegan frosting post)
    Instructions
    1. Preheat oven to 350 F.
    2. In a medium-sized bowl, whisk together PBR, apple cider vinegar, sugar and oil until slightly frothy.
    3. Mix in the flour, baking soda, and baking powder until just combined.
    4. Bake for 20 minutes or until cupcakes bounce back when lightly touched.
    5. When cool, frost with vegan buttercream.

    Read more at http://www.cupcakeproject.com/2012/10/hipster-vegan-cupcakes-pbr.html#6MHWvjAX8TFZZDPZ.99

    Wednesday, December 25, 2013

    Gingerbread Waffles

    This Christmas  morning I decided to try a festive breakfast - gingerbread waffles.  The husband loves gingerbread, so I figured he wouldn't mind a deviation from a cold bowl of cereal for breakfast.


    The kitchen smelled amazing while these were cooking!  The original recipe makes 16 waffles, which is far too many for us, so I halved the recipe.  But if you're cooking for a crowd, definitely make a full batch.


    These are the perfect way to start Christmas (although I'm sure they're just as good any old day.)  Now, do you think it's too early for mulled wine...?


    Happy holidays everyone!


    Gingerbread Waffles
    (from Food Network)
    Makes 8 waffles

    1 1/2 cups all-purpose flour
    2 tsp baking powder
    1 tsp ground cinnamon
    1 tsp ground ginger
    1/4 tsp nutmeg
    1/4 teaspoon salt
    2 large eggs
    1/3 cup packed dark brown sugar
    1/2 cup canned pumpkin puree
    1/2 cup + 2 Tbsp milk
    1/4 cup molasses
    1/4 cup (1/2 stick) melted butter, plus some to butter the iron (if necessary)

    Preheat waffle iron.

    In a large bowl combine flour, baking powder, cinnamon, ginger, nutmeg and salt. In a medium bowl, beat eggs and brown sugar until fluffy, then beat in pumpkin, milk, molasses and melted butter. Stir the wet into dry until just moist. Do not overstir the waffle batter.  If necessary (it's not on my iron), brush the iron with a little melted butter.  Pour a heaping 1/3 cup into hot, greased waffle maker and cook by your wafflemaker's instructions.  Keep warm and crispy on a cooling rack-cookie sheet in a 250 degree oven until ready to eat.
     
    Serve with toppings of choice (butter and maple syrup were perfect for us.)
     
    Enjoy!

    Friday, December 6, 2013

    Overnight Crockpot Carrot Cake Porridge

    Imagine a chilly and frosty morning, and you don't want to get out of bed.  But then you catch the warm scent of cinnamon and spices wafting from your kitchen.  So you get up, and there is a crockpot full of warm and cozy porridge, ready to be eaten.  Sounds amazing, right?


    I've been making overnight crockpot oatmeal for months now, and it's been fantastic.  A healthy, warm, and cheap breakfast ready for you when you wake up - what more could you want?  Mostly it's been an apple-cinnamon variety, but we've also tried peach-blueberry, strawberry-banana, and pumpkin pie.  I'll have to share the other versions as well because they are all delightful.


    This flavor was inspired from a favorite blog of mine, Oh She Glows.  Sneaking vegetables into breakfast, but it tastes like a dessert?  Win-win.  You may be asking what makes this a "porridge."  Well, porridge is defined as "a dish consisting of oatmeal or another meal or cereal boiled in water or milk."  So, we'll go with that.


    The perfect winter breakfast!

    Overnight Crockpot Carrot Cake Porridge
    (inspired by Oh She Glows)
    Makes 4-6 servings

    1/2 cup steel-cut oats
    1/2 cup short-grain brown rice
    1/4 cup pearled barley
    1/4 cup whole oat groats (I get these in a bulk bin at Whole Foods, but if you can't find them, just add more steel-cut oats)
    3 cups shredded carrot
    2 tsp cinnamon
    1/2 tsp ginger
    1/4 tsp nutmeg
    Pinch of salt
    2 tsp vanilla extract
    1/4 cup brown sugar
    6 cups water

    To top off:
    Milk of choice (I used coconut, but regular/soy/almond would work too)
    Chopped walnuts or pecans
    Raisins
    Brown sugar/maple syrup to taste

    Before going to bed, prepare your porridge.  Place a Slow Cooker Liner in your crockpot (Reynolds makes them, by the Ziploc bags).  If you don't want to spend an eternity scrubbing your crockpot - use one of these!  Trust me.  They're amazing.

    In your lined crockpot, pour in your steel-cut oats, brown rice, barley, groats, carrot, cinnamon, ginger, nutmeg, salt, vanilla, brown sugar and water.  Stir.  Cover and set your crockpot to low and cook overnight.

    In the morning, stir the porridge, and add in at least 1/2 cup raisins.  Top off your bowl with milk of choice, chopped nuts and sweetener.  Enjoy!

    Sunday, October 27, 2013

    Berry Almond Oatmeal Kale Granola

    Stay with me!  I know this sounds weird...or gross...or unappealing.  It's not - it's awesome.  Let me explain.  Regular granola is great, but isn't it such a disappointment at how unhealthy it really is?  High calorie and so fatty, ugh.  When I stumbled upon this recipe from Eating Bird Food, I just had to give it a shot.  Plus, I love to try out unusual flavor combinations.  For example, when I gave our Executive Director  THIS cupcake without telling him what flavor it was he said, "Knowing you, it's something weird, but good."


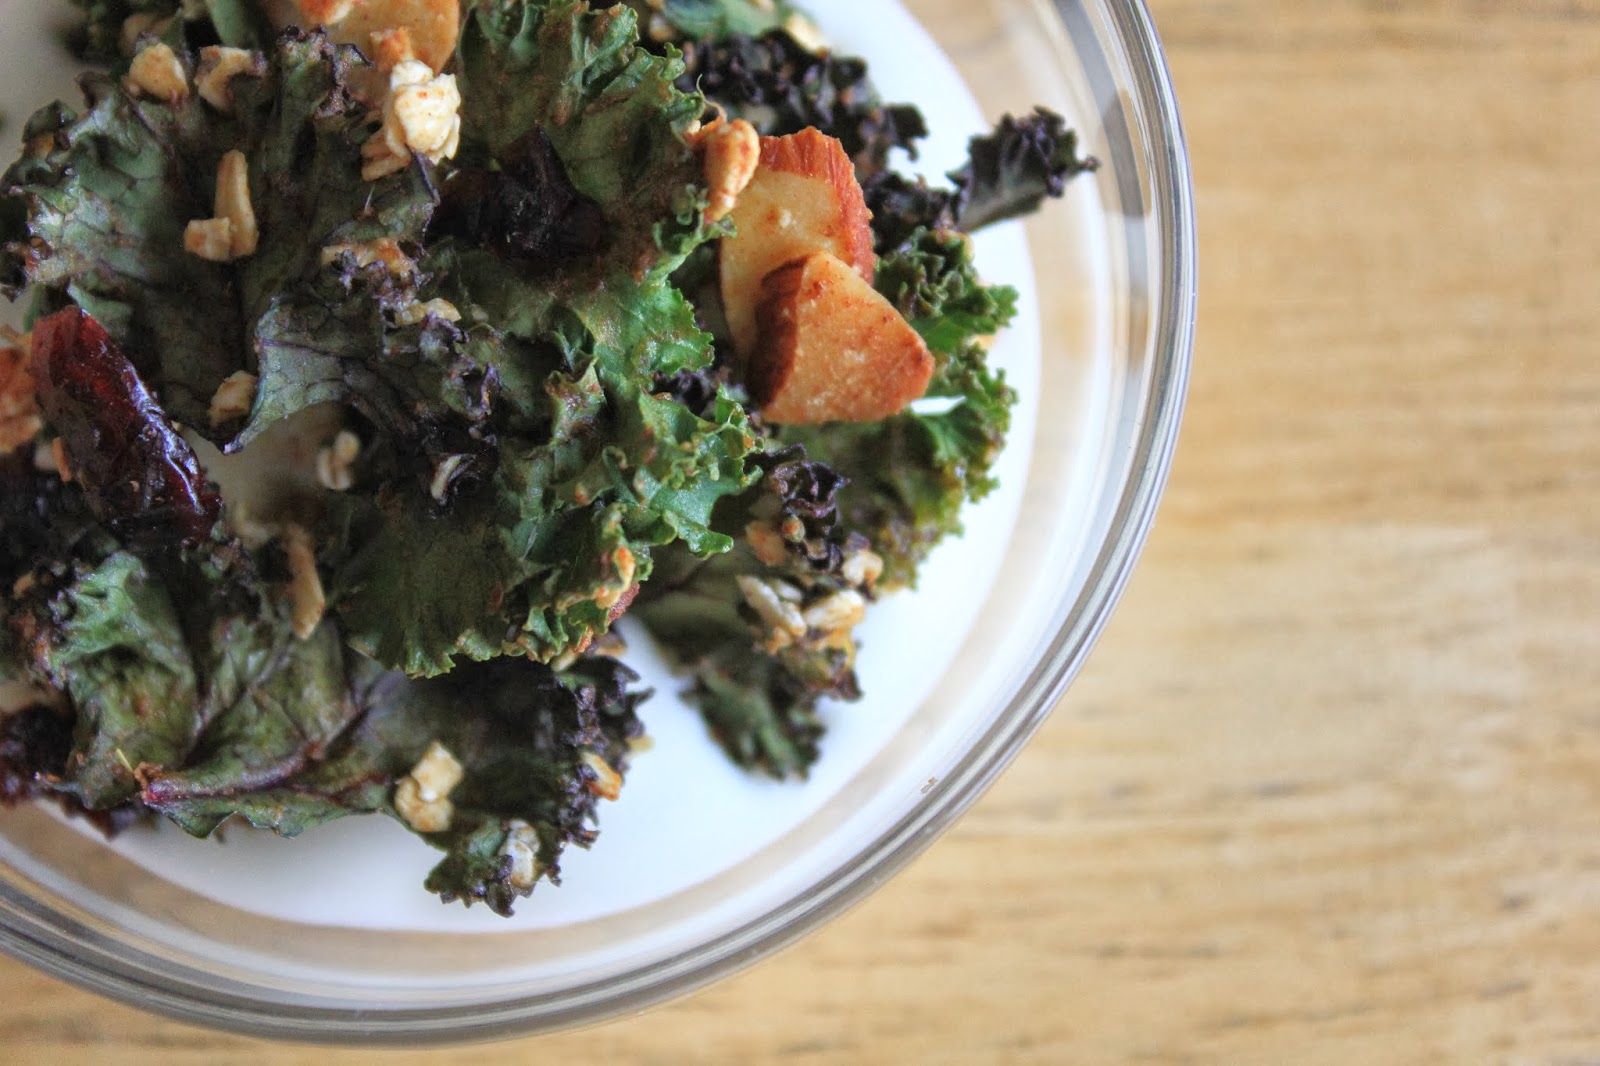
    If calling this 'granola' is too much to wrap your head around, just think of it as sweet kale chips!  Now kale has a pretty distinct bitter flavor, but the preparation really cuts through that and makes a light, crispy, sweet, cinnamon-y treat.  The original recipe calls for a dehydrator, but since I do not have one, I'm extremely grateful that the author of Eating Bird Food figured out how to bake them in the oven.


    It's quite clever how a paste of dates and mango (two of the sweetest fruits to combat kale's bitterness) with cinnamon is then rubbed into the leaves and transforms this hearty leaf to a crispy and sweet treat.  Add in your favorite dried fruit (I used craisins and cherries) and sliced almonds.  The original recipe also called for shredded coconut, but I cut that out since I don't really care for it.  After my first batch, I thought it would be nice to make it a bit more granola-like, so at a friend's suggestion I added oatmeal.


    You're still not sold.  Okay, imagine a warm, cinnamon-y scent wafting through your kitchen.  Smells great, right?  (Yes, there are a multitude of other ways to accomplish this - apple pie, zucchini bread, cinnamon rolls, etc, but this one won't leave you feeling lethargic and sugar-blasted.  And it's really tasty.)


    Almost everyone that I gave a sample to liked it (and even the husband was snatching a few off the cookie sheet).  In addition to snacking on it dry, I'd also like to note that it's quite good on yogurt, just like regular granola.  It's a fun way to get your greens, so be daring and give it a try!

    Berry Almond Oatmeal Kale Granola
    (Adapted from Eating Bird Food)

    1 large bunch of kale, washed, dried, de-stemmed and torn into bite-size pieces
    5-6 pitted medjool dates (I used fresh because they were available, but dried is okay too)
    ½ cup fresh or frozen mango (thawed), chopped into chunks
    1 teaspoon cinnamon
    ½ teaspoon sea salt
    ½ cup dried cherries, blueberries or cranberries
    ½ cup sliced almonds
    ½ cup oatmeal (I used 1 minute oats, just because they're smaller and this is such a light and crispy snack, but rolled oats would be fine)
    1. In a medium bowl, soak the dates in ½ cup water for at least 30 minutes, or until softened.
    2. Make sure your kale is as dry as you can get it. Then place it in a large bowl.
    3. In a food processor, chopper or high powered blender, combine the soaked dates + 1 tablespoon of soaking liquid and fresh mango. Blend until it is a thick paste. Add the cinnamon and salt and blend briefly to combine.
    4. Add paste to kale leaves and massage with your hands to coat each leaf, until all leaves are coated
    5. Add in the dried berries, almonds and oatmeal and mix well so these items get coated as well.
    6. Pre-heat your oven to 300°, spread kale into a thin layer on two cookie sheets lined with parchment paper.  Bake for roughly 30 - 40 minutes with the oven door slightly ajar (a wooden spoon wedged in the oven door works perfectly for this). Maybe sure to watch at the 30 minute mark gets close so that the kale doesn’t start to burn.  Spread and flip the kale, if needed, to completely dry it out.  You want it light and crispy, but not scorched.
    7. Once cooled, store in an airtight container.
    Enjoy!

    Saturday, October 12, 2013

    Cowboy Cookies (Vegan)

    I never tire of trying out new cookie recipes, and after a few trials this one has become a favorite of mine.  It's easy, quick, and tastes great.  Particularly straight from the mixing bowl.  Seriously, I could just sit down with a bowl of this and be perfectly content.


    You might have noticed that I reference quite a few cookbooks from this same author - Isa Chandra Moskowitz.  I love her stuff.  It seems to just get better and better with each new cookbook.  And you certainly do not have to be vegan to enjoy her recipes! 

    Who's got two thumbs and is psyched for Isa's new book coming out in a few weeks?  THIS GIRL.  Anyway, it's not really relevant to this post, but I thought I'd share the good news.  Now back to your regularly scheduled, drool-worthy cookies...


    This recipe originally was one of those I thought to whip up on a Friday right before work.  And it's so easy that it was no problem.  I fiddled with the original recipe a bit - swapping out half the oil for unsweetened applesauce, and also swapping out part of the flour for whole wheat flour.  It wasn't because the recipe needed tweaking, but mostly so I felt less guilty about eating a spoonful....or five.


    These are husband and coworker approved!

    Cowboy Cookies (Vegan)
    (Slightly adapted from Vegan Cookies Invade Your Cookie Jar)
    Makes 2-3 dozen, depending how large you make them

    2 cups quick-cooking oats
    1 1/2 cups all-purpose flour
    1/2 cup whole wheat flour
    1 tsp baking soda
    1/2 tsp baking powder
    1/2 tsp salt
    1/3 cup canola oil
    1/3 cup unsweetened applesauce
    2/3 cup granulated sugar
    3/4 cup firmly packed brown sugar
    1/2 cup nondairy milk
    1 Tbsp ground flax seeds
    1 tsp vanilla extract
    1/2 cup (heaping) semi-sweet chocolate chips
    1/2 cup (heaping) dark chocolate chips
    1 cup chopped walnuts or pecans (I used walnuts)
    1/4 cup (or more to your taste) cocoa nibs
    ***You may change the additions, of course!  Other nuts, shredded coconut, raisins, craisins, etc are other popular additions.

    Preheat oven to 350 degrees.  Line two baking sheets with parchment paper.

    In a medium-size bowl, stir together oats, flour, baking soda, baking powder, and salt.  Set aside.

    In a large bowl, beat together oil, applesauce, both sugars, nondairy milk, flax seeds, and vanilla.  Fold in half of the flour mixture to moisten, then fold in the remaining half.  Just before the mixture is completely combined, fold in the chocolate chips, nuts, and cocoa nibs.

    For each cookie, drop 2-3 Tbsp size ball of dough (slightly smaller than a golf ball) onto the paper lined cookie sheets.  The dough will be sticky and thick, and you won't be able to roll it in your hands.  (Or if you do, it'll be a mess, and you'll just have to lick all of it off your hands.  Oops.)  Leave about 2 inches of space between each cookie.  Flatten slightly with moistened fingers.

    Bake for 14-16 minutes until edges start to brown, then remove from oven.  Let the cookies rest on the baking sheet for 5 minutes, then transfer to wire racks to complete cooling.  Store in a loosely covered container.

    Enjoy!

    Wednesday, September 25, 2013

    Grandma's Zucchini Bread

    This is the time of year when everyone seems to have an inordinate amount of zucchini squash.  And you're forcing it on friends and family, or sneakily leaving it at work for coworkers.  "Please take some!"  There are lots of savory applications for zucchini, of course, but this classic baked good brings me back to my childhood in a wonderfully nostalgic way.


    My grandma had a garden, and therefore ended up with LOTS of zucchini.  Each year she would make this bread and I would swipe as many pieces as possible.  It's a very straightforward Midwestern recipe that everyone can enjoy.


    It also freezes VERY well, so feel free to bake many loaves and freeze a couple for the winter when you really are craving anything with produce in it.


    Zucchini Bread
    (My grandma's recipe!)
    Makes 2 loaves

    3 eggs, beaten
    1 c. oil  (you can substitute half with unsweetened applesauce if you're trying to be a bit healthier)
    2 c. sugar
    2 c. grated zucchini
    1 tsp vanilla extract
    3 c. all-purpose flour
    1 tsp baking powder
    1 tsp salt
    1 tsp baking soda
    1 Tbsp cinnamon
    1 c. walnuts, chopped

    Preheat oven to 350 degrees.  In a large bowl, mix together the eggs, oil, and sugar first, and then add in the zucchini.  Then mix in the flour, baking powder, salt, baking soda, cinnamon and fold in the walnuts.  Line 2 loaf pans with parchment paper.  Bake at 350 degrees about 1 hour, until a toothpick comes out clean.

    Enjoy!

    Sunday, September 15, 2013

    Truffled Mac and Cheese

    I have a confession.  The husband and I eat a lot of mac and cheese.  Kraft... mac and cheese.  As much as I enjoy home cooked meals, I haven't ever found a mac and cheese recipe that I like.  Until now.


    To be fair, this recipe has been around the internet for quite awhile - it's a Martha Stewart recipe, after all.  But, I've put my own little spin on it by adding the truffle oil.  Truffle oil just makes everything a little bit better.  I recently had a truffled mac and cheese at a local restaurant and it was fantastic.  (And now I can save the $13 and just make my own!)  The truffle oil is optional, of course, if that's not quite your thing.

    Also optional are all the veggies on the side.  Two different kinds of veggies make it healthy, right?  At least that's what I was telling myself when I was eating this meal.


    The focus of this recipe is the cheese, obviously, so I would encourage you to splurge and get good stuff.  Not the yellow, rubbery block of preservatives that some companies call cheese.  But if all you have is some of that stuff, go for it, and get the good cheese the next time.


    The original recipe calls for what is essentially croutons on top.  Which I think is weird.  I used panko bread crumbs instead, and I'm so glad I did.  It created a wonderful golden, crunchy crust that is the perfect foil for the gooey, creamy cheese inside.


    Now, the original recipe also uses a 9 x 13 inch pan.  As much as we love mac and cheese, that was even a little extreme for us (but mostly our waistlines and wallets).  I halved the recipe which was perfect for us.  But if you need to feed a crowd, go ahead and make the full recipe.  Or if you want a lot of leftovers.  Bonus - this recipe reheats well!  As the husband says, "it's just awesome."

    Truffled Mac and Cheese
    (Adapted from Smitten Kitchen)
    Makes 5-6 servings

    4 tablespoons (1/2 stick) unsalted butter, plus more for casserole
    1/2 cup panko breadcrumbs
    2 3/4 cups milk
    1/4 cup all-purpose flour
    1 teaspoon coarse salt, plus more for water
    Pinch ground nutmeg
    Pinch teaspoon freshly ground black pepper
    Pinch teaspoon cayenne pepper
    2 1/4 cups (about 9 ounces) grated sharp white cheddar cheese
    1/2 cup (about 2 ounces) grated Gruyère
    1/4 cup + 1 Tbsp (about 1.2 ounces) grated Pecorino Romano cheese
    1 Tbsp white truffle oil
    1/2 pound elbow macaroni

    1. Preheat oven to 375°F. Butter a 2-quart casserole dish; set aside. Place the panko breadcrumbs in a medium bowl. In the microwave, melt 1 tablespoon of butter. Pour the melted butter into the bowl with the breadcrumbs, and toss. Set the breadcrumbs aside.

    2. Warm the milk in a medium saucepan over medium heat. Melt the remaining 3 tablespoons butter in a high-sided skillet over medium heat. When the butter bubbles, add the flour. Cook, stirring, 1 minute.

    3. While whisking, slowly pour in the hot milk a little at a time to keep mixture smooth. Continue cooking, whisking constantly, until the mixture bubbles and becomes thick, 8 to 12 minutes.

    4. Remove the pan from the heat. Stir in salt, nutmeg, black pepper, cayenne pepper, truffle oil, and about 3/4 of the cheese; set the cheese sauce aside.

    5. Cover a large pot of salted water, and bring to a boil. Cook the macaroni until the outside of pasta is cooked and the inside is underdone, 2 to 3 minutes. Transfer the macaroni to a colander, rinse under cold running water, and drain well. Stir the macaroni into the reserved cheese sauce.  It will seem like there is too much cheese sauce, but I promise that there isn't!  All that extra sauce not only tastes great, but helps it reheat well.

    6. Pour the mixture into the prepared dish. Sprinkle the remaining cheese, and the breadcrumbs over the top. Bake until golden brown, about 30 minutes (though we needed a bit more time to get it brown, but your oven may vary). Transfer the dish to a wire rack for 5 minutes; serve.

    Enjoy!