Showing posts with label chocolate. Show all posts

Tuesday, March 4, 2014

Chex Mix Cupcakes with Chocolate Buttercream

I love getting requests to bake cupcakes for a friend's birthday.  It's fun to try and figure out which kind they might like best.  This friend always gives out tins of homemade Chex Mix for the holidays, so I thought it would be fun to incorporate that into a cupcake.  And who doesn't love a salty-sweet combination?


Before I started baking, I wanted to make sure I was on track with the flavor profile so I tried a handful (or five) of Chex Mix with some chocolate chips.  Um... yes.  That ought to work just fine, but maybe I ought to try a few more handfuls, just to make sure?


Kaylee was also interested in a treat... (don't worry, she got one that was more salmon inspired than salty-sweet inspired.)


They were a huge hit at work!  Seriously, nothing makes me happier than brightening people's day with a sweet treat.


Chex Mix Cupcakes
(adapted from  Cupcake Project)
Makes 16 cupcakes

1 c. sugar
1 c. all-purpose flour
1 c. food-processed Chex Mix
1/2 tsp. baking soda
1 1/2 tsp baking powder
1/2 c. unsalted butter, room temperature
2 large eggs
1 c. milk

Preheat oven to 350 degrees F.  In a medium-sized bowl, mix sugar, flour, ground Chex Mix, baking soda, baking powder, and butter until combined.  Mix in egg.  Mix in milk, a little at a time.

Fill cupcake liners 3/4 full.  Bake for 20 minutes or until a toothpick inserted into the center of a cupcake comes out clean.  Let cupcakes cool in cupcake tin for a few minutes.  Then remove to a cooling rack, and let cool completely.


Chocolate Buttercream Frosting (vegan)
(from Vegan Cupcakes Take Over the World)
Makes enough for 2 dozen cupcakes

1/4 c. margarine, softened
1/4 c. shortening
1/2 c. unsweetened cocoa powder (sifted if there are clumps)
2 1/2 c. powdered sugar, sifted
3 Tbsp soymilk
1 1/2 tsp vanilla extract

Cream together the margarine and the shortening until well combined.  Add the cocoa powder and incorporate well.  Add the powdered sugar in about 1/2 cup batches and beat well, adding a little splash of soymilk after each addition.  When all ingredients have been well incorporated, add the vanilla and beat until light and fluffy (about 3 minutes with a hand mixer, 7 minutes if mixing with a fork).

To finish cupcakes:
Sea salt
Mini chocolate chips
Chex Mix

Pipe frosting on top of cooled cupcakes.  Top with sea salt, mini chocolate chips, and a few Chex Mix.

To note, top off with Chex Mix no more than a few hours before serving.  More than that and the Chex Mix gets soggy, and nobody wants that!

Enjoy!

Saturday, October 12, 2013

Cowboy Cookies (Vegan)

I never tire of trying out new cookie recipes, and after a few trials this one has become a favorite of mine.  It's easy, quick, and tastes great.  Particularly straight from the mixing bowl.  Seriously, I could just sit down with a bowl of this and be perfectly content.


You might have noticed that I reference quite a few cookbooks from this same author - Isa Chandra Moskowitz.  I love her stuff.  It seems to just get better and better with each new cookbook.  And you certainly do not have to be vegan to enjoy her recipes! 

Who's got two thumbs and is psyched for Isa's new book coming out in a few weeks?  THIS GIRL.  Anyway, it's not really relevant to this post, but I thought I'd share the good news.  Now back to your regularly scheduled, drool-worthy cookies...


This recipe originally was one of those I thought to whip up on a Friday right before work.  And it's so easy that it was no problem.  I fiddled with the original recipe a bit - swapping out half the oil for unsweetened applesauce, and also swapping out part of the flour for whole wheat flour.  It wasn't because the recipe needed tweaking, but mostly so I felt less guilty about eating a spoonful....or five.


These are husband and coworker approved!

Cowboy Cookies (Vegan)
(Slightly adapted from Vegan Cookies Invade Your Cookie Jar)
Makes 2-3 dozen, depending how large you make them

2 cups quick-cooking oats
1 1/2 cups all-purpose flour
1/2 cup whole wheat flour
1 tsp baking soda
1/2 tsp baking powder
1/2 tsp salt
1/3 cup canola oil
1/3 cup unsweetened applesauce
2/3 cup granulated sugar
3/4 cup firmly packed brown sugar
1/2 cup nondairy milk
1 Tbsp ground flax seeds
1 tsp vanilla extract
1/2 cup (heaping) semi-sweet chocolate chips
1/2 cup (heaping) dark chocolate chips
1 cup chopped walnuts or pecans (I used walnuts)
1/4 cup (or more to your taste) cocoa nibs
***You may change the additions, of course!  Other nuts, shredded coconut, raisins, craisins, etc are other popular additions.

Preheat oven to 350 degrees.  Line two baking sheets with parchment paper.

In a medium-size bowl, stir together oats, flour, baking soda, baking powder, and salt.  Set aside.

In a large bowl, beat together oil, applesauce, both sugars, nondairy milk, flax seeds, and vanilla.  Fold in half of the flour mixture to moisten, then fold in the remaining half.  Just before the mixture is completely combined, fold in the chocolate chips, nuts, and cocoa nibs.

For each cookie, drop 2-3 Tbsp size ball of dough (slightly smaller than a golf ball) onto the paper lined cookie sheets.  The dough will be sticky and thick, and you won't be able to roll it in your hands.  (Or if you do, it'll be a mess, and you'll just have to lick all of it off your hands.  Oops.)  Leave about 2 inches of space between each cookie.  Flatten slightly with moistened fingers.

Bake for 14-16 minutes until edges start to brown, then remove from oven.  Let the cookies rest on the baking sheet for 5 minutes, then transfer to wire racks to complete cooling.  Store in a loosely covered container.

Enjoy!

Tuesday, September 3, 2013

Dark Chocolate Cupcakes with Basil Buttercream

Earlier this summer I was at my favorite chocolate factory perusing their delightful offerings and trying not to drool.


They had a smaller specialty bar that I hadn't seen before, the Basilico Pignoli.  A chocolate bar with basil pesto in it.  I was intrigued by this savory and sweet combination.  I purchased it and was pleasantly surprised at how well those flavors went together.  This cupcake was inspired by that chocolate bar.  Incidentally, that bar ended up being the chocolate sprinkles on top of the cupcakes.  A nice symmetry, no?  :-)


I should say, also, that I made this for a friend's birthday.  She happens to love basil pesto, so she seemed like the perfect recipient for these.  And, as I suspected, she loved these as well.
 

For the recipe, I combined a few different recipes to get the best balance of flavors.  I already had a fantastic dark chocolate cupcake recipe that I have paired with a tasty peanut butter frosting.  (Actually, I made those last year for this same friend!)  And then I found the perfect frosting from the awesome experimental Cupcake Project blog.


She infused the basil flavor into the frosting by first making a "basil sugar."  Then whipping it up in a normal buttercream.  The balance was perfect, and I was delighted that it worked so well.


Overall, it's a unique flavor combo that is divine.  I WILL be making these again.  And again.  And again...


Dark Chocolate Cupcakes
(Recipe adapted from Cook’s Illustrated)
Makes 12 cupcakes

8 tablespoons (1 stick) unsalted butter, cut into 4 pieces
2 ounces bittersweet chocolate, chopped
½ cup (1.5 ounces) cocoa powder
¾ cup (3.75 ounces) all-purpose flour
½ teaspoon baking soda
¾ teaspoon baking powder
2 eggs
¾ cup (5.25 ounces) granulated sugar
1 teaspoon vanilla extract
½ teaspoon table salt
½ cup (4 ounces) sour cream

Adjust oven rack to lower-middle position and preheat to 350 degrees F. (If you are using a non-stick muffin pan, heat the oven to 325 degrees F.) Line standard-size muffin pan with baking cup liners.

Combine butter, chocolate, and cocoa in medium heatproof bowl. Set bowl over saucepan containing barely simmering water; heat mixture until butter and chocolate are melted and whisk until smooth and combined. (Alternately, you can microwave the mixture at 50% power, stirring every 30 seconds until completely melted.) Set aside to cool until just warm to the touch.

Whisk flour, baking soda, and baking powder in small bowl to combine.

Whisk eggs in second medium bowl to combine; add sugar, vanilla, and salt until fully incorporated. Add cooled chocolate mixture and whisk until combined. Sift about one-third of flour mixture over chocolate mixture and whisk until combined; whisk in sour cream until combined, then sift remaining flour mixture over and whisk until batter is homogeneous and thick.

Divide the batter evenly among muffin pan cups. Bake until skewer inserted into center of cupcakes comes out clean, 18 to 20 minutes.  Do not overbake, or they will be dry.

Cool cupcakes in muffin pan on wire rack until cool enough to handle, about 10-15 minutes. Carefully lift each cupcake from muffin pan and set on wire rack. Cool to room temperature before icing, about 30 minutes.


Basil Sugar
(from Cupcake Project)

1 large handful of fresh basil leaves
1 cup sugar (granulated or powdered sugar, depending on what you're going to use it for)

Rinse basil leaves and gently pat dry with a towel.
Pulse basil leaves in a food processor until they are as small as you can get them. Don't worry if there are still some big pieces since you'll process them further in a bit. You should end up with about one packed tablespoon of chopped up basil. Add more basil or remove some if you are too far off.
Place processed basil and sugar in a small bowl and use a spoon to mix well, pressing the basil into the sugar.
Place the basil sugar in the food processor and pulse to fully combine.
If not using within three days, store in the freezer until ready to use.
If basil sugar starts to get clumpy, pulse again in a food processor just before using.


Basil Buttercream
(from Cupcake Project)
Makes enough for 12 cupcakes (not piled high)

1/2 cup unsalted butter, room temperature
1 cup basil powdered sugar
1 cup powdered sugar
1/4 teaspoon salt

In a medium-sized mixing bowl, beat butter until light and fluffy, about 3 minutes on high speed.
Mix in basil powdered sugar a little bit at a time.
Mix in powdered sugar a little bit at a time.
Mix in salt.
Pipe or spread onto cooled cupcakes.

Enjoy! 
 

Saturday, August 3, 2013

Chocolate Chip Cookies (Vegan)

I believe I'm lucky enough to already have the perfect chocolate chip cookie recipe, however it's not vegan friendly at all.  One morning, before work, I had a craving for cookies (c'mon, it's not that weird), and thought I'd give this vegan recipe a shot.

I love how quickly some of these vegan cookies come together.  When the husband came out of the bedroom, all ready for work, he was pleasantly surprised with the baked cookie scent wafting throughout the apartment.  In the morning?!?!?

(There really is no better way to start your day than a freshly baked cookie.  Just saying.)


Because it's vegan I didn't have to soften any butter, or cream the butter and sugar, and that saved quite a bit of time.  The base is white and brown sugars with oil that you beat with a fork until it's the texture of caramel (about 2 minutes).  A chemical reaction occurs when the sugars and oil mix, and if you get lazy about this step you will be left with some greasy, separated cookies and then nobody has a good time.


I brought these cookies to the office and everyone was so impressed - you baked these before work???  Little do they know how quick and easy it was.


The flavor was very good, and I seriously doubt anyone would have known they were vegan unless I had told them.


Do you have some vegan friends to bake for?  Are you out of butter/shortening/eggs?  Do you just want a quick and tasty cookie?  This is the recipe for you!


Chocolate Chip Cookies

(from Post Punk Kitchen)
Makes ~ 2 dozen cookies

1/2 brown sugar
1/4 white sugar
2/3 cup canola oil
1/4 cup unsweetened almond milk (or your favorite non-dairy milk)
1 tablespoon tapioca flour (arrowroot or cornstarch are suitable substitutes)
2 teaspoons pure vanilla extract

1 1/2 cups all purpose flour (I had to use 2 cups because it was just too wet to hold any shape)
1/2 teaspoon baking soda
1/2 teaspoon salt

3/4 cups chocolate chips
     (If you're looking for vegan chocolate chips, Whole Foods has some, or you can use Ghirardelli     Semi-Sweet Chocolate Chips that contain no dairy products).

Preheat oven to 350 F. Line baking sheets with parchment paper.

Mix together sugars, oil, milk and tapioca flour (or substitute) in a mixing bowl. Use a strong fork and mix really well, for about 2 minutes, until it resembles smooth caramel. There is a chemical reaction when sugar and oil collide, so it’s important that you don’t get lazy about that step. Otherwise the sugar and oil will separate during baking and create a gross, greasy mess on your cookie sheet.  Mix in the vanilla.

Add 1 cup of the flour, the baking soda and salt. Mix until well incorporated. Mix in the rest of the flour. Add in extra flour if the dough is too wet, like mine was.  Fold in the chocolate chips.

Drop rounded tablespoon of dough onto lined baking sheet. They will spread just a bit. Place on a baking sheet and bake for about 6-8 minutes until they are just a little browned around the edges. I did have to bake mine a little bit longer due to the wetness of the dough.  Let cool on the baking sheet for about 5 minutes then transfer to a cooling rack.


Enjoy!

Sunday, July 21, 2013

Mexican Hot Chocolate Snickerdoodles (vegan)

I've been making many tasty things in the past few weeks, but I haven't been diligent about taking photos and posting.  Too busy eating, I suppose.  Oops.  My apologies, dear Reader(s)!


However, I do have this recipe for you, and it's great.  A simple cookie that's a twist on a classic, and it just so happens to be vegan.


When you first bite into it, you taste chocolate, "oh, how nice..." and then the creeper cayenne comes in with a bit of heat for a surprise.


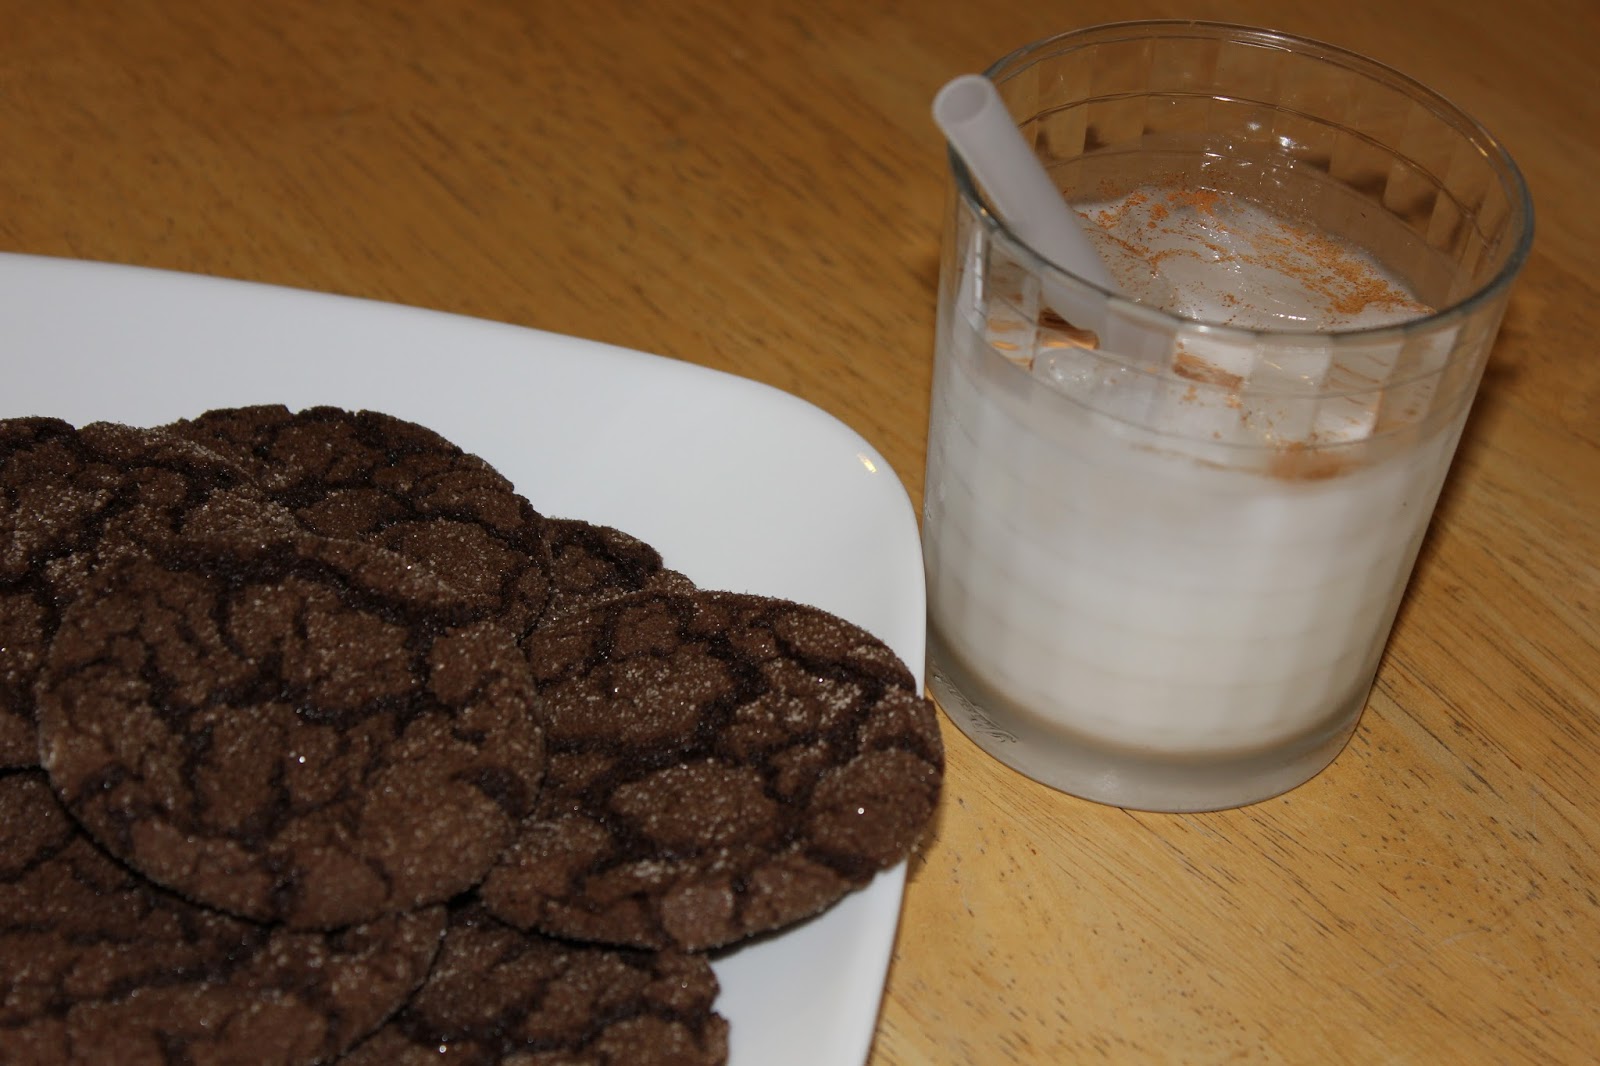
After eating a cookie or five two, it dawned on me what the perfect beverage would be to accompany them - horchata!  Luckily, I happened to have some on hand, and the cool, cinnamon-laced rice drink was absolutely wonderful after the depth and kick of the cookies.  I don't have the recipe posted for that quite yet, but I will - promise!


Mexican Hot Chocolate Snickerdoodles
(from Vegan Cookies Invade Your Cookie Jar)
Makes 2 dozen cookies

For the topping:
1/3 cup sugar
1 teaspoon ground cinnamon

For the cookies:
1/2 cup canola oil
1 cup sugar
1/4 cup pure maple syrup
3 tablespoons almond milk (Or your preferred non-dairy milk)
1 teaspoon vanilla extract
1 teaspoon chocolate extract (or more vanilla extract if you have no chocolate)
1 2/3 cups flour
1/2 cup unsweetened cocoa powder
1 teaspoon baking soda
1/4 teaspoon salt
1/2 teaspoon cinnamon
1/2 teaspoon cayenne

Preheat oven to 350 F. Line 2 large baking sheets with parchment paper.

Mix the topping ingredients together on a flat plate. Set aside.

In a medium mixing bowl, use a fork to vigorously mix together oil, sugar, syrup, and milk. Mix in extracts.

Sift in remaining ingredients, stirring as you add them. Once all ingredients are added mix until you’ve got a pliable dough.

Roll dough into walnut sized balls. Pat into the sugar topping to flatten into roughly 2 inch discs. Transfer to baking sheet, sugar side up, at least 2 inches apart (they do spread). This should be easy as the the bottom of the cookies should just stick to your fingers so you can just flip them over onto the baking sheet. Bake for 10 to 12 minutes, they should be a bit spread and crackly on top. Remove from oven and let cool for 5 minutes, then transfer to a cooling rack to cool completely.

Enjoy!

Sunday, June 23, 2013

Fudgy Chocolate Oatmeal Cookies (vegan)

Flax seeds and oatmeal in a cookie practically make it a health food, right?  Let's go with yes.  Nevermind the sugar or oil...


These cookies may not win any beauty contests, but they taste amazing.  I was pleasantly surprised when I sampled the dough.  And then proceeded to eat a spoonful... or five.  The husband came in the kitchen for a test and promptly walked off with the bowl.  Bonus of vegan cookies - no worries about raw egg in the dough!  Not that it has ever stopped me from eating cookie dough before...


I did manage to bake the cookies, despite our gratuitous sampling, and they turned out wonderfully.  Chocolaty and chewy - what more can you ask for?  I brought them to work, and they were gone in a flash.  I was in a meeting with my boss and she commented how she was still thinking about the cookies and really wanted another.


I wasn't sure a vegan cookie could hold its own in flavor and richness, but these sure did.  It really doesn't matter that there aren't any eggs or butter!  Bake them, you won't regret it!


The original recipe does call for dried fruit of some kind - raisins, cherries, craisins, if you like.  But anytime I have dried fruit in a cookie, I just feel like they are the bits that should be chocolate.  So, mix them in if you want, but it was my preference to go for just chocolate.

**7/22/13 EDIT: If you'd prefer to lower the caloric impact, I recommend using unsweetened applesauce in place of half of the canola oil.  1/3 cup unsweetened applesauce and 1/3 cup canola oil.  It didn't change the texture or flavor, and is much better for you!

Fudgy Chocolate Oatmeal Cookies
(from Vegan Cookies Invade Your Cookie Jar)
Makes ~ 3 dozen cookies

2 cups quick-cooking oats
1 2/3 cups all purpose flour
2/3 cup cocoa powder
1/2 tsp baking soda
1/2 tsp baking powder
3/4 tsp salt
1 1/2 cups granulated sugar
2 Tbsp ground flax seeds
2/3 cup nondairy milk (I used almond)
2/3 cup canola oil
1 1/2 tsp vanilla extract
1/4 tsp almond extract
1 cup chocolate chips (I used a mix of milk, dark, and mini chocolate chips)

Preheat oven to 350 degrees.  Line two baking sheets with parchment paper.

In a medium-size bowl, stir together oats, flour, cocoa powder, baking soda, baking powder, and salt.  Set aside.

In a large bowl, beat together sugar, flax seeds, and nondairy milk until smooth.  Add the oil and the vanilla and almond extracts and beat until well mixed.  Fold in half of the flour mixture to moisten, then fold in the remaining half.  Just before the mixture is completely combined, fold in the chocolate chips.

For each cookie, drop 2 Tbsp of dough onto the cookie sheet, leaving about 2 inches of space between each cookie.  If desired (for a crisper, less chewy cookie), flatten slightly with fingers.  Bake for 10 to 12 minutes until cookies are firm and risen.  Let the cookies rest on the baking sheet for 5 minutes, then transfer to wire racks to complete cooling.  Store in a tightly covered container.

Enjoy!

Thursday, May 30, 2013

Cupcakes for Two

No idea why, but I've been having a major craving for sweets lately.  But, I didn't want to make a huge batch of anything to tempt me all week.  Luckily, I found some recipes of cupcakes for two.  Perfect!  The husband was happy to be my partner in cupcake consumption.


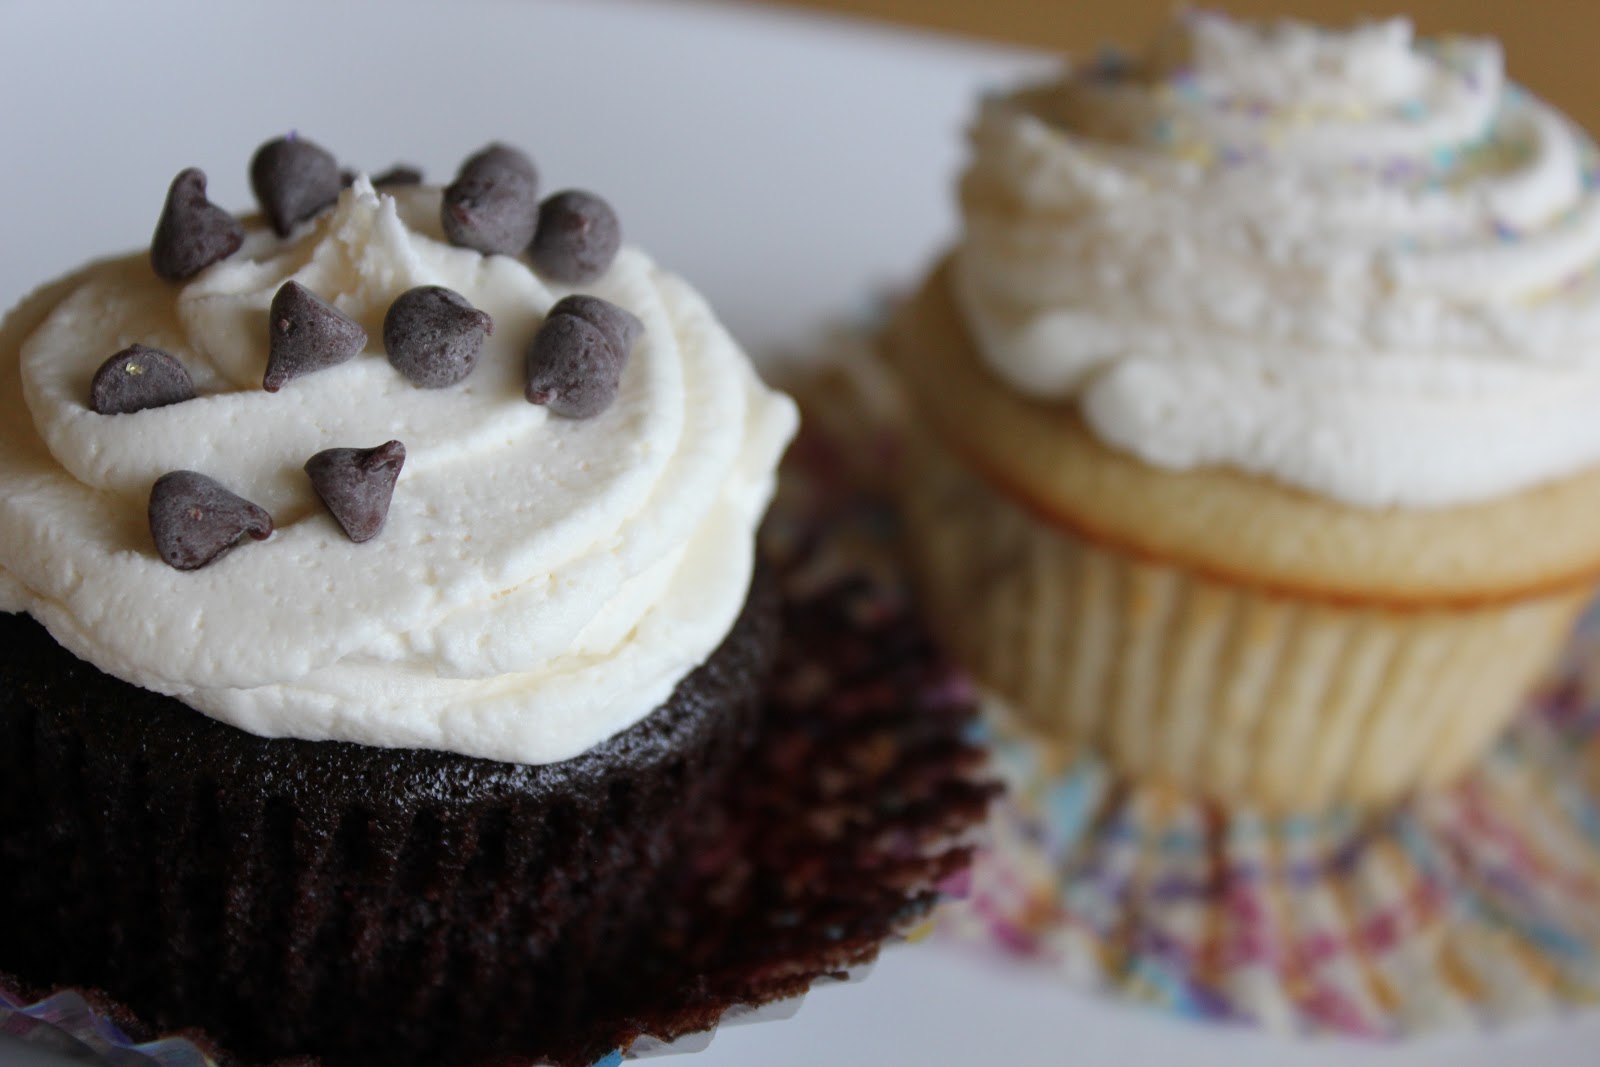
 One recipe was for a vegan chocolate cupcake.  The other for a more traditional vanilla cupcake.


They were both incredibly easy and came together quickly.  Two little cupcakes, all by themselves in the pan...


With the cupcakes baked and cooling, the missing ingredient was frosting.  Vanilla frosting is a favorite of mine and would work well with both flavors of cake.  A full batch was obviously overkill, but I found a very small yield recipe that solved the dilemma for me.


I doubled the frosting recipe because the original was supposed to be for only two cupcakes, and I had four cupcakes awaiting their sweet topping.  Well...that made way more than I needed, and I piled the frosting on fairly high.  But, no problem, the frosting freezes, and I've saved the rest for the next time I bake up a pair of cupcakes... (hm, tonight maybe?)


Both cupcakes tasted great.  I was particularly impressed with the vegan chocolate cupcake.  It was tender and flavorful, and you would never know it didn't have any eggs or butter.  The vanilla cupcake was good, and a bit heavier and chewier.  Next time, I might just tweak the chocolate one by omitting the cocoa powder and trying it as a vanilla cupcake.


But really, no complaints from anyone here!

Chocolate Cupcakes for Two (Vegan)
(from An Edible Mosaic)
Makes 2 cupcakes

3 tablespoons all-purpose flour
2 tablespoons sugar
1 tablespoon natural unsweetened cocoa powder (not Dutch-processed)
1/8 teaspoon + 1/16 teaspoon baking soda
1/16 teaspoon salt (1/16 is a healthy pinch)
3 tablespoons milk, any kind you like (be sure to use a vegan “milk” if keeping this recipe vegan is a concern)
1 tablespoon canola oil, or other neutral-flavored oil (I used coconut oil)
1/2 teaspoon pure vanilla extract

Preheat oven to 350F; line a muffin tray with 2 paper liners.

Whisk together the flour, sugar, cocoa, baking soda, and salt in a medium bowl. Add the milk, oil, and vanilla, and stir just until combined, being careful not to over-mix.

Divide the batter between the 2 lined muffin wells and bake until a toothpick inserted inside comes out clean, about 18 to 22 minutes.

Cool 5 minutes in the tray, then transfer to a wire rack to finish cooling.


Vanilla Cupcakes for Two
(from How Sweet It Is)
Makes 2 cupcakes

1 egg white
2 tablespoons sugar
2 tablespoons butter, melted
1 teaspoon vanilla (yes, a full teaspoon – they are super vanilla-y!)
1/4 cup flour
1/4 heaping teaspoon of baking powder
pinch of salt
1 1/2 tablespoons milk

Preheat oven to 350 degrees. Line a muffin pan with 2 liners.

In a bowl, add egg white and sugar and whisk until combined. Add in vanilla and melted butter and stir until mixed. Add flour, baking powder and salt and stir until smooth. Stir in milk. Divide batter equally between the 2 cupcake liners.

Bake at 350 for 10-15 minutes, or until cake is set. Let cool completely.


Vanilla Frosting for Two
(from Bells, Bowls, and Bobbins)
Makes more than enough for two

2 Tbsp butter, softened
2 Tbsp Crisco
1/4 tsp vanilla extract
~3/4 cup powdered sugar (add as much as you need for the proper consistency)
1/2 tsp meringue powder (optional)

Mix butter, Crisco, and vanilla.  Add in powdered sugar 1/4 cup at a time until you reach the desired consistency.  I also added meringue powder, like I do with all my buttercream frostings, but it is not necessary.

Scoop frosting into Ziploc bag and pipe onto cupcakes.  Top with your favorite addition (chocolate chips, sprinkles, etc).

Enjoy!


Sunday, May 19, 2013

Perfect Chewy Brownies

Chocolately, rich, and chewy with a shiny, crackly top - the perfect brownie.  I've made from-scratch brownies before, and they were good, but they are rarely the baked perfection one is longing for.  I've only found the sought-after perfection in a boxed mix, of all things, specifically Ghiradelli brownies.  You know the ones.  They're amazing.  I always figured, why bother making mediocre from-scratch brownies when I can have outstanding brownies from a box?

Until now.


Cook's Illustrated has done all the work and perfected the chewy brownie.  And they have a four page article on it.  That, my friends, is dedication.  They dissect every facet and figure out the best way to do it.


The first time I tried this recipe (months ago), the flavor was great, but the top wasn't shiny and crackly.  I'm certain it was a user error on my part.  But that held me back from making it again, all the better for my waistline.  However, I was getting itchy for an amazing brownie and figured I'd give it another shot.  And they came out absolutely perfect.  I had intended on bringing some to work, but then...just "forgot."  The husband and I were forced to eat them all.  Oops.  I made them a second time, and did bring some to work and it was quite fun to see everyone's reaction of pure awe and delight.


If you're looking for a healthy brownie recipe, I suggest looking elsewhere.  If you're looking for something amazingly-wonderful-perfect, then this is the brownie for you.  You may be tempted to add something to them - caramel, nuts, other bits of things.  DON'T.  There are other recipes that require that sort of dressing up, and this particular brownie is pure bliss because of its wonderful simplicity.


Go bake some!  Now!  And I won't tell if you sneak an extra five one.  They're worth it, I promise!

Perfect Chewy Brownies
(from Cook's Illustrated)
Makes 24 two-inch brownies

1/3 cup cocoa powder
1 1/2 tsp instant espresso (optional, and I did not use it)
1/2 cup & 2 Tbsp boiling water
2 oz. unsweetened chocolate, finely chopped (a serrated knife works well for this)
4 Tbsp (1/2 stick) unsalted butter, melted
1/2 cup & 2 Tbsp vegetable oil
2 large eggs
2 large egg yolks
2 tsp vanilla extract
2 1/2 cups white, granulated sugar
1 3/4 cups unbleached all-purpose flour
3/4 tsp salt
6 oz. bittersweet chocolate, cut into 1/2 inch pieces (I used Ghiradelli bittersweet chips)

Adjust oven rack to lowest position and heat oven to 350 degrees.  Line 13 x 9 inch pan with foil or parchment paper.  Keep in mind you will have to lift the brownies out of the pan to cool, so leave some extra foil/paper on the edges for you to grab.  If using foil, spray with cooking spray.

Whisk cocoa, espresso powder (if using), and boiling water together in large bowl until smooth.  Add unsweetened chocolate and whisk until chocolate is melted.  Whisk in melted butter and oil.  (Mixture may look curdled.)  Add eggs, yolks, and vanilla and continue to whisk until smooth and homogeneous.  Whisk in sugar until fully incorporated.  Add flour and salt and mix with rubber spatula until combined.  Fold in bittersweet chocolate pieces.

Scrape batter into prepared pan and bake until toothpick inserted halfway between edge and center comes out with just a few moist crumbs attached, 30 to 35 minutes.  Transfer pan to wire rack and cool 1 1/2 hours.  If your baking dish is glass, cool the brownies 10 minutes, then remove them promptly from the pan (otherwise, the superior heat retention of glass can lead to overbaking).

Using foil/paper overhang, lift brownies from pan.  Return brownies to wire rack and let cool completely, about 1 hour (yeah, right).  Cut into 2-inch squares and serve.

Leftovers  can be stored in an airtight container at room temperature for up to 4 days.

Enjoy!

Thursday, April 4, 2013

Chocolate Chip Cookie Dough Cupcakes

I love chocolate chip cookie dough.  Don't get me wrong, baked cookies are fantastic, but I really love eating the raw dough.  I know a lot of folks are worried about the raw egg, but it hasn't killed me yet.  Very scientific, I know.  But my dad, also a cookie dough lover, has been eating raw dough for over 50 years without incident, so I'm not particularly worried.  However, that being said, the raw dough in this recipe is egg free, so no worries!


I had a suspicion these cupcakes would be over the top, so I wanted to make them for just the right occasion.  I think my birthday is sufficient, so bring on the ridiculous amount of dough!


The awesomeness begins with a brown butter cupcake.  Mine ended up a little more amber than brown (I'm terrified of burning it), but the caramel and nutty flavors still shined through.  Then the cupcake is filled with a ball of raw (and eggless) dough.  The frosting is thinned out raw dough, which pipes nicely.  The whole thing is topped off with a tiny ball of chocolate chip cookie dough.


It's amazing.  Very rich, but really, really yummy.  Definitely a favorite birthday treat of mine!


The verdict: Just what I was hoping for - super tasty!
The husband's thoughts: Really liked it.  Might sprinkle chocolate chips on top instead of the extra little ball of dough.
Changes for next time: I might lessen the sugar in the raw dough a bit, just so it's a bit more balanced and not too sweet.
Difficulty: Easy, but multiple steps

Chocolate Chip Cookie Dough Cupcakes
(from Cupcake Project)
Makes 12 cupcakes

1/2 cup unsalted butter
1 1/2 cups cake flour
1 tsp baking powder
1/2 tsp baking soda
1/4 tsp salt
2 egg whites
1 cup sugar
2 tsp vanilla extract
1/2 cup whole milk
1/2 cup semi-sweet chocolate chips

Melt butter over medium-heat in a small skillet or heavy-bottomed pot.  Continue to heat the butter, stirring it, until it turns brown (10-15 minutes).  The butter will foam, and then form large bubbles, and then begin to turn brown.  Promptly remove from stove to avoid burning it.  For a bit more information on browning butter, look HERE.  Pour browned butter into bowl and let cool to room temperature.

In a small mixing bowl, whisk together cake flour, baking powder, baking soda, and salt.  In large bowl, whip egg whites until light and frothy.  Slowly mix sugar into the egg whites.  Mix cooled browned butter and vanilla into the wet mixture.  Alternately mix dry ingredients and milk into the wet mixture.  Mix in chocolate chips.

Fill cupcake liners 3/4 full.  Bake at 350 F degrees for 20 minutes or until cupcakes bounce back with lightly touched.  Remove to cooling rack and cool to room temperature before filling and frosting.

Raw Cookie Dough (for filling and frosting)
Makes...far more than you need, but who cares?  Save it for ice creams or eating it with a spoon.
(You may also use your own favorite cookie dough recipe!)

3/4 cup unsalted butter, melted
1/2 cup white sugar
1 cup packed brown sugar
1 Tbsp vanilla extract
4 Tbsp milk
1/2 tsp salt
2 cups all-purpose flour
Mini chocolate chips (to your preferences)
Heavy cream (~1/4 to 1/2 cup)

Mix butter, sugars, vanilla, milk and salt.  Then stir in flour (you may need to add more to get to an easily-rolled consistency).  Take out roughly 1/3 of dough, and place in small bowl.  Add mini chocolate chips to the smaller amount.  Scoop out about 1 rounded teaspoon of dough and roll into ball and set on parchment paper.  You'll need a dozen of these.  Then roll out 12 even smaller balls for decoration on top of the cupcakes.

With remaining 2/3 of plain dough, mix in cream until you reach desired consistency for piping.

Construction
Core out cooled cupcakes to make room for filling.  Feel free to eat the bits!  Drop in larger rolled ball of cookie dough. Pipe 'frosting' onto cupcake and top with smaller ball of cookie dough.

Enjoy!
Monday, March 18, 2013

Salted Chocolate-Peanut Butter Cookies with Pretzels

Last weekend was a rough one - I had two full days (and then some) of meetings at work.  It was very stressful, so to keep the morale up of my team I did what I do best - I baked!  A batch of muffins and two batches of cookies, and they were enjoyed by all.  One of the batches of cookies was a chocolate-red wine cookie (I'll post it soon, promise), and my boss was eating them with pretzels.  She commented that they were fantastic together.  Who doesn't like a salty-sweet combo?  And that gave me an idea to try that flavor profile in one cookie...


I was surprised to find that such a recipe doesn't exist (that I could find, anyway).  A bar or brownie, perhaps, but not exactly what I was looking for.  So I did some modifying and came up with this little gem.


I thought chunks of pretzel would be good for flavor and crunch.  I bought small, sturdy pretzel twists and used an oh-so-high-tech-smashing-device to crush them up a bit, just into bite-sized pieces.  (Who doesn't like to smash things with a rolling pin?)  To avoid the pretzels absorbing moisture and getting sort of stale, I put them only on the top and not mixed into the dough. 


I also knew I wanted to top them off with coarse sea salt.  You have to sprinkle it on after baking (otherwise it just gets absorbed), but of course it doesn't stick too well to a baked cookie.  When I made the Nutella-Stuffed, Brown Butter Chocolate Chip Cookies with Sea Salt, I noticed the salt stuck to the melted chocolate chips quite well.  So, why not drizzle some melted chocolate on top of these cookies?  No one says no to more chocolate!  (If they do, I'm sure something is wrong with them.)


These cookies are husband, friend, and coworker approved.  Won't you welcome them into your home?


Salted Chocolate-Peanut Butter Cookies with Pretzels
(heavily adapted from Brown Eyed Baker)
Makes ~ 3 dozen cookies

1¼ cups all-purpose flour
½ cup unsweetened cocoa powder
1 teaspoon baking powder
½ teaspoon baking soda
½ teaspoon salt
½ cup (4 ounces) unsalted butter, at room temperature
¾ cup creamy peanut butter
2/3 cup light brown sugar
1/3 cup granulated sugar
2 eggs
2 teaspoons vanilla extract
1 cup semisweet chocolate chips
~ 1 cup pretzels, slightly crushed
~ 1 cup dark/semi-sweet chocolate chips, melted
Coarse sea salt for sprinkling

Preheat oven to 350 degrees F. Line three baking sheets with parchment paper or a silicone baking mat.

In a medium bowl whisk together the flour, cocoa powder, baking powder, baking soda and salt; set aside.

Beat together the butter, peanut butter and both sugars on medium speed until light and fluffy, about 3 minutes, scraping the bowl as needed. Add the eggs one at a time, beating well after each addition. Add the vanilla extract. Scrape the bowl. Add the dry ingredients and mix on low until just combined. Using a rubber spatula, stir in the chocolate chips.  If dough feels too soft to work with, feel free to pop it in the fridge for a bit.

Take heaping tablespoonful of dough, roll into a ball and place on cookie sheet, spacing the cookies about 2 inches apart.  Press pieces of pretzel on top of unbaked cookie.  Bake for about 12 minutes, or until the outside of the cookies are set but the middles are still a little soft. Cool cookies on the baking sheets for a few minutes and then place them on a cooling rack.

Melt chocolate chips, and drizzle on top of cooled cookies (I used a Ziploc bag with the corner cut, of course).  Sprinkle a small pinch of coarse salt on top of each cookie.  Place cookies in fridge to set the chocolate (for roughly 15-30 minutes), and store in an airtight container at room temperature.

Enjoy!

Thursday, February 28, 2013

Homemade Thin Mints

We all have a favorite, and we look forward to each February when we can finally have it - Girl Scout cookies.  We indulge and then must patiently wait until next year when those adorable girls come to us with their sign up sheets.  Well, NO MORE! 

Not that I'm discouraging supporting the Girl Scouts, of course not!  This recipe is for all of the other months in the year, when we crave those cookies, and they are unavailable to us.


The husband loves Thin Mints, so I thought I'd take a crack at those before I try my favorite (Tagalongs).  There are a myriad of recipes to choose from, and after sifting through the options, I chose this one.


Now, the original called for some more all-natural ingredients, which are great, but I stuck to the easily-accessed ingredients.  It calls for powdering some special sugar, but I just used regular granulated sugar.  I did powder it, in my little grinder that I use for flax seeds (so perhaps some extra fiber and omega-3s snuck in...), but I'm sure you could live dangerously and use straight granulated sugar.  I didn't use confectioner's sugar because it contains an anti-caking agent and I didn't know if that would react differently or not.


Some folks preferred making the dough into logs and slicing them, but I liked the idea of using a small biscuit cutter to get perfect, uniform circles compared to a slightly-misshapen cookie.  Also, after the cookies were dipped and the chocolate set, there was the inevitable excess that created a little pool around the cookie.  I thought it unattractive, so I found that a pizza cutter worked extremely well for trimming it off.


These cookies have a great flavor.  They're not quite as sweet as the real deal (but is that really a bad thing?)  Mine also weren't super-crisp, but again, I consider that a point in its favor.  And the husband?  He loves them!


So tuck this recipe away for when you're craving them and give them a whirl!

Homemade Thin Mints
(adapted from Mother Nature Network)
 Makes roughly 2 dozen

1/2 cup (1 stick) of butter, room temperature
1/2 cup of granulated sugar, powdered (or not)
1/2 cup of good quality cocoa powder
1 teaspoon of vanilla extract
1/4 teaspoon salt
3/4 cup all-purpose flour
2 cups chocolate chips (I used 60% Ghiradelli chips, and the better chocolate made the final product that much better)
1 teaspoon peppermint extract
2 tablespoons butter or coconut oil

With a mixer, cream the butter. Add the sugar, and continue to cream until light and fluffy. Add the cocoa powder, salt and vanilla and mix until well combined and it is the texture (and flavor) of frosting.  Add the flour and mix until just combined. Gather into a ball and flatten into a disk. Wrap well and place in the freezer for 15 minutes or the fridge for 30+ minutes.

Put parchment paper on two cookie sheets. Preheat the oven to 350 degrees F.

Dust a work surface with flour and roll out the dough thinly (remember that these are supposed to be thin cookies), but not so thin as to make it hard to transfer, about 1/8 of an inch. Cut out with a small round shape (a small biscuit cutter worked perfectly).  The dough will crack a bit when it's straight out of the freezer, but when it warms slightly it is flexible.  If it becomes too sticky/warm to work with, place in the freezer or fridge for a few minutes to firm it back up.  Place on cookie sheets and bake for 10 minutes.

Remove from oven and carefully slide the parchment paper with the cookies onto cooling rack and let cool completely.

Melt chocolate chips with butter/coconut oil in microwave or double boiler.  When melted stir in peppermint extract and mix well.

Put more parchment on the now-cooled cookie sheets.

Carefully drop each cookie into the melted chocolate and spoon chocolate over the top of each cookie. Use two forks to fish it out and gently shake them to remove excess chocolate. Place on parchment paper. Repeat until all of the cookies are covered. Place cookies in freezer for 30 minutes to harden.  Trim off excess chocolate with pizza cutter.

Enjoy!

Sunday, February 10, 2013

Chocolate Swirl Buns

What to bake, what to bake... A friend suggested something with yeast.  Hm.  If you hadn't already guessed, I'm not much of a bread baker.  The closest I get is quick breads and biscuits, which isn't close at all.  Yeast is... temperamental and time-consuming.  Not my idea of a good time.  Although I do love the results of it, I never got into actually baking with it myself.  Until now!


I remembered this recipe from Smitten Kitchen and I was intrigued.  Why not?  The worst that could happen would be an unleavened mess.  Not exactly an apocalyptic catastrophe.


After proofing the yeast and mixing the dough with my never-used-dough-hook, it was time for it to rise.  I was hopeful until I noticed that after 30 minutes, it hadn't really risen at all.  Drat. 


The husband actually has a bit of experience with bread baking and suggested moving the covered bowl to the top of the radiator for a little warmth.  And he told me that unlike simple flour and water dough, dough with butter and eggs doesn't have the same dramatic rise and they rise slower.  Whew.  And after an hour, it had doubled in size - success!


The rest came together just fine.  The results are not only attractive, they're tasty!  I look forward to sharing them with my coworkers to start the week off right!


Chocolate Swirl Buns
(from Smitten Kitchen)
Makes about a dozen

Dough
1/2 cup (120 ml) milk
1/4 cup (50 grams) plus a pinch of granulated sugar
1 packet active dry yeast
1 large egg, brought to room temperature
2 cups (250 grams) all-purpose flour, plus more for work surface
1/2 teaspoon table salt
3 tablespoons (45 grams) unsalted butter, at room temperature, plus additional for bowl and muffin tins

Filling
3 tablespoons (45 grams) unsalted butter, at room temperature
1/4 cup (50 grams) granulated sugar
1/2 pound (225 grams) semisweet chocolate
Pinch of salt
3/4 teaspoon ground cinnamon (optional)

Prepare dough: Warm milk and a pinch of sugar to between 110 to 116°F. If you don’t have a thermometer, you’re looking for it to be warm but not hot to the touch; best to err on the cool side. Sprinkle yeast over milk and let stand until foamy, about 5 minutes. In a small bowl, whisk together egg and remaining 1/4 cup sugar, then slowly whisk in yeast mixture.

In a stand mixer fitted with the paddle attachment, combine flour and salt. Run mixer on low and add egg mixture, mixing until combined. Add butter and mix until incorporated. Switch mixer to dough hook and let it knead the dough for 10 minutes on low speed. At 10 minutes, it should be sticky and stringy and probably worrisome, but will firm up a bit after it rises. Grease a large bowl and place dough in it. Cover loosely with a lint-free towel or plastic wrap and let rise for 1 hour, or until doubled.

Meanwhile, prepare filling: If your chocolate is in large bars, roughly chop it. Then, you can let a food processor do the rest of the work, pulsing the chopped chocolate with the salt, sugar, and cinnamon (if using) until the chocolate is very finely chopped with some parts almost powdery. Add butter and pulse machine until it’s distributed throughout the chocolate. (If you don’t have a food processor, just chop the chocolate until it’s very finely chopped, then stir in the sugar, salt, cinnamon and butter until it makes a pasty/chunky/delicious mess.) Set mixture aside.

Generously grease a standard 12-muffin tin; set aside.

Form buns: Once dough is doubled, turn it out onto a well-floured surface and gently deflate it with floured hands. Let it rest for another 5 minutes. Once rested, roll dough into a large, large rectangle. The short sides should be a scant 11 to 12 inches. The other side can be as long as you can roll it. The longer you can make it, the more dramatic and swirled your buns will be.

Sprinkle the filling evenly over the dough’s surface. It’ll be clumpy and uneven and probably look like there’s too much chocolate for the volume of dough; just do your best. Tightly roll the dough back over the filling from one short end to the other, forming a 12 to 13-inch log. With a sharp serrated knife, gently saw 1-inch segments off the log and place each in a prepared muffin cup.  When cutting, don't press down, but let the weight of the knife do the work (it keeps the buns from getting squished).  Loosely cover buns with plastic wrap or a lint-free towel and let them rise for another 30 minutes.

Meanwhile, preheat your oven to 350°F (180°C).

Bake buns for 15 to 20 minutes, until puffed and brown. If you have an instant read thermometer, you can take the buns out when it reads 185 to 190 degrees in the middle of each bun.

Set buns on cooling rack. Theoretically, you should cool them completely before unmolding them (with the aid of a knife or thin spatula to make sure nothing has stuck).  Just wait as long as you can before burning your tongue on the chocolate-y goodness.

Do ahead: These buns can be formed, placed in the muffin cups and refrigerated (loosely covered with plastic, which you might want to oil to keep it from sticking) the night before, to bake in the morning. You can bake them directly from the fridge. They can be baked and frozen until needed, up to 1 month.

Enjoy!