Thursday, May 30, 2013

Cupcakes for Two

No idea why, but I've been having a major craving for sweets lately.  But, I didn't want to make a huge batch of anything to tempt me all week.  Luckily, I found some recipes of cupcakes for two.  Perfect!  The husband was happy to be my partner in cupcake consumption.


 One recipe was for a vegan chocolate cupcake.  The other for a more traditional vanilla cupcake.


They were both incredibly easy and came together quickly.  Two little cupcakes, all by themselves in the pan...


With the cupcakes baked and cooling, the missing ingredient was frosting.  Vanilla frosting is a favorite of mine and would work well with both flavors of cake.  A full batch was obviously overkill, but I found a very small yield recipe that solved the dilemma for me.


I doubled the frosting recipe because the original was supposed to be for only two cupcakes, and I had four cupcakes awaiting their sweet topping.  Well...that made way more than I needed, and I piled the frosting on fairly high.  But, no problem, the frosting freezes, and I've saved the rest for the next time I bake up a pair of cupcakes... (hm, tonight maybe?)
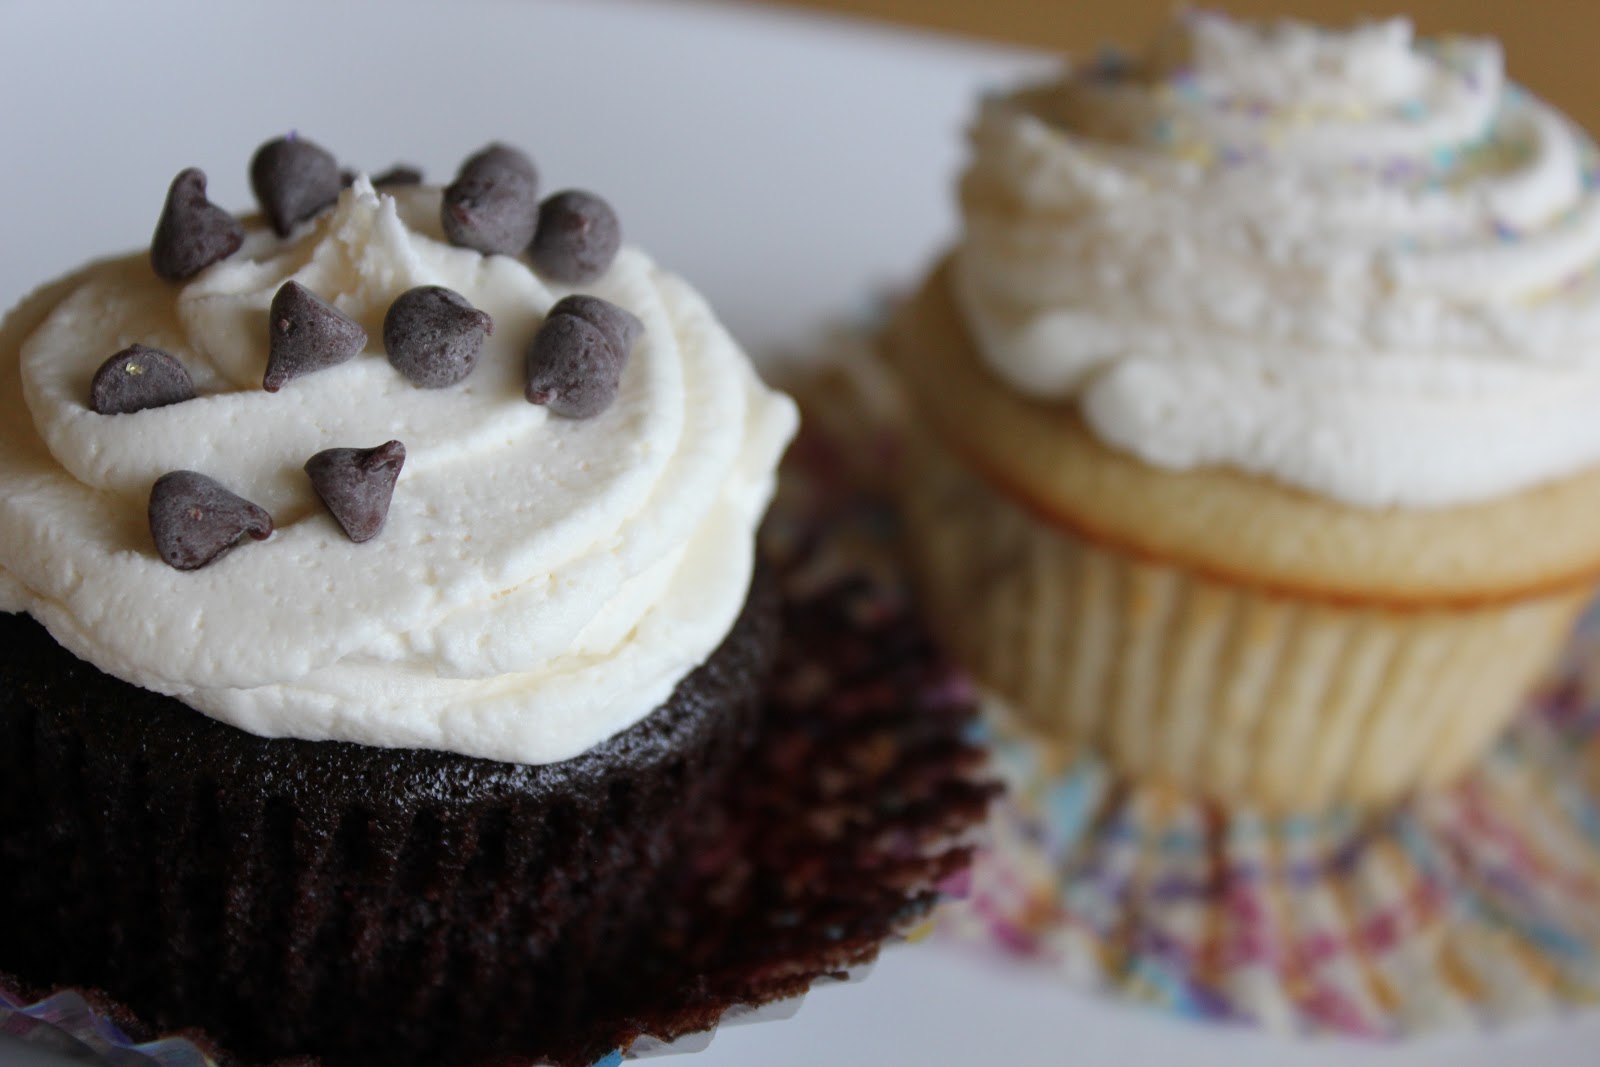

Both cupcakes tasted great.  I was particularly impressed with the vegan chocolate cupcake.  It was tender and flavorful, and you would never know it didn't have any eggs or butter.  The vanilla cupcake was good, and a bit heavier and chewier.  Next time, I might just tweak the chocolate one by omitting the cocoa powder and trying it as a vanilla cupcake.


But really, no complaints from anyone here!

Chocolate Cupcakes for Two (Vegan)
(from An Edible Mosaic)
Makes 2 cupcakes

3 tablespoons all-purpose flour
2 tablespoons sugar
1 tablespoon natural unsweetened cocoa powder (not Dutch-processed)
1/8 teaspoon + 1/16 teaspoon baking soda
1/16 teaspoon salt (1/16 is a healthy pinch)
3 tablespoons milk, any kind you like (be sure to use a vegan “milk” if keeping this recipe vegan is a concern)
1 tablespoon canola oil, or other neutral-flavored oil (I used coconut oil)
1/2 teaspoon pure vanilla extract

Preheat oven to 350F; line a muffin tray with 2 paper liners.

Whisk together the flour, sugar, cocoa, baking soda, and salt in a medium bowl. Add the milk, oil, and vanilla, and stir just until combined, being careful not to over-mix.

Divide the batter between the 2 lined muffin wells and bake until a toothpick inserted inside comes out clean, about 18 to 22 minutes.

Cool 5 minutes in the tray, then transfer to a wire rack to finish cooling.


Vanilla Cupcakes for Two
(from How Sweet It Is)
Makes 2 cupcakes

1 egg white
2 tablespoons sugar
2 tablespoons butter, melted
1 teaspoon vanilla (yes, a full teaspoon – they are super vanilla-y!)
1/4 cup flour
1/4 heaping teaspoon of baking powder
pinch of salt
1 1/2 tablespoons milk

Preheat oven to 350 degrees. Line a muffin pan with 2 liners.

In a bowl, add egg white and sugar and whisk until combined. Add in vanilla and melted butter and stir until mixed. Add flour, baking powder and salt and stir until smooth. Stir in milk. Divide batter equally between the 2 cupcake liners.

Bake at 350 for 10-15 minutes, or until cake is set. Let cool completely.


Vanilla Frosting for Two
(from Bells, Bowls, and Bobbins)
Makes more than enough for two

2 Tbsp butter, softened
2 Tbsp Crisco
1/4 tsp vanilla extract
~3/4 cup powdered sugar (add as much as you need for the proper consistency)
1/2 tsp meringue powder (optional)

Mix butter, Crisco, and vanilla.  Add in powdered sugar 1/4 cup at a time until you reach the desired consistency.  I also added meringue powder, like I do with all my buttercream frostings, but it is not necessary.

Scoop frosting into Ziploc bag and pipe onto cupcakes.  Top with your favorite addition (chocolate chips, sprinkles, etc).

Enjoy!


Tuesday, May 28, 2013

Pink Lemonade Bars

As a kid, Memorial Day always marked the beginning of summer.  School was almost over for the year, and the days got longer and warmer.  That's not exactly how it works in the Pacific Northwest (we won't get summer until July 5, really...)  However, Memorial Day still brings to mind cooking out on a sunny day - bratwurst, hamburgers, potato salad, beer, and some fruity dessert.  And Smitten Kitchen has supplied the perfect dessert for a summer get together - Pink Lemonade Bars.


A sweet shortbread crust with a tangy, sweet, lemony filling - yum.  And no food coloring!  There's fruit in it, so it's healthy, right?


It was a pretty easy recipe overall.  However, I will admit that I stupidly struggled with the raspberry puree a bit.  After liquefying the berries in the food processor, I attempted to strain out the seeds with my fine-mesh sieve, as directed.  Nothing actually came through the sieve, despite me pressing on it a bit.  Hm.  So I tried a slightly larger fine-mesh sieve, and only after some manipulation did the puree begin to come through.  But then, to my dismay, some seeds made it through as well.  Gah!  So then I went back to my original fine-mesh sieve, and got what I needed.


I'm sure there was some user error, and it left me with quite a mess, but in the end, it all worked out quite well.  Next time, I might try it with some cooked-down strawberries for the 'pink', just to see if it's any easier.  And also to try a different flavor.


These bars were a delightful finish to our "inner-city grilling" (using a broiler for brats works amazingly well).  I'm sure these bars will be quite the summer favorite!


Pink Lemonade Bars
(from Smitten Kitchen)
Makes 1 8x8 pan - Number depends on how large you cut them!

For the base:
1/4 cup (50 grams) granulated sugar
1/4 teaspoon freshly grated lemon zest
1/8 teaspoon table salt
1/2 cup (4 ounces or 115 grams) unsalted butter, cut into chunks
1 cup (125 grams) flour

For the lemonade layer:
1 cup (about 5 ounces or 140 grams) raspberries
2 large eggs
3/4 cup (150 grams) granulated sugar
1/4 cup freshly squeezed lemon juice; this should only require 1 large or 2 small lemons
1/3 cup (40 grams) all-purpose flour
Confectioners’ sugar, for dusting

Preheat your oven to 350°F (180°C) and line an 8x8x2-inch baking pan with parchment, letting it extend up two sides. Butter or coat the bottom and sides with a nonstick spray and set the pan aside.

Make the base: In a food processor, pulse together the sugar, zest and salt until combined. Add the butter and pulse until it is evenly dispersed in the dough. Add the flour and pulse the machine until it’s just combined and the mixture is crumbly. Press the dough into the prepared pan and about 1/2-inch up the sides. Don’t worry about making this perfect; mine was an uneven mess and nobody can tell. Bake for 15 minutes, until lightly browned at edges. Let cool on a rack while you prepare the filling (though no need for it to be completely cool when you fill it). Leave oven on.

Make the pink lemonade layer: Puree the raspberries in your food processor until they’re as liquefied as they’ll get. Run the puree through a fine-mesh sieve, trying to press out all the raspberry puree that you can, leaving the seeds behind. I ended up with 1/3 cup strained puree; don’t worry if you get a smidge less, you won't need it all.

In a medium bowl, whisk together the eggs, sugar and lemon juice until smooth. Whisk in 3 tablespoons of raspberry puree*. Stir in flour. Pour into cooling crust and return pan to the oven, baking the bars until they’re set (they’ll barely jiggle) and slightly golden at the edges, about 25 to 30 minutes. Cool completely before cutting into rectangles. (You can speed this up in the fridge.)  Dust with powdered sugar just prior to serving.

*So, this is just to note that clearly the amount of red tint one gets from the berries can vary greatly by the berries. If yours looks crazy saturated with pink and you’ve only added two tablespoons puree, you can always add another tablespoon lemon juice instead of the last spoonful of raspberry. On the flipside, if your berries seem pale, you can always add one less tablespoon of lemon juice and one more of the raspberries. The main thing is that you keep the amount of liquid (lemon juice + raspberry puree) at 7 tablespoons. More, and the bars might seem too soft. Less, they might seem too eggy.

Enjoy!

Friday, May 24, 2013

Shaved Asparagus Pizza

I had purchased asparagus with the intention of roasting it with shallots, but then I wanted to try something new.  After some searching, I found an intriguing recipe on Smitten Kitchen - Shaved Asparagus Pizza.  In my opinion, pizza is the perfect food, so this seemed like an excellent idea.


And an excellent idea it was!  The husband and I both loved it.  After eating dinner, I was posting on Facebook about how wonderful it was and our two friends down the hall just happened to drop by, and oh, what's that great smell?  ;-)  We found ourselves with some very willing taste testers who agree on the awesomeness of this recipe.


Now, I didn't follow the recipe exactly; I tweaked things here and there, but the recipe remains simple and delicious. So simple and delicious that I made it three times in the past week.  THREE.  I don't think I've done that with any recipe ever.  Well, except maybe this one.


I have a confession to make - I use a box mix for our pizza crusts.  I have some solid reasons though: 1) It tastes good and has a great crispy texture 2) It takes only a few minutes to prep, unlike from-scratch recipes that take at least an hour 3) It costs less than a dollar to purchase 4) You only have to add water, and a bit of flour for kneading.  Win-win-win-win!  So the Jiffy Pizza Crust is our stand-by whenever we make homemade pizza (a few times month).  If you're looking for it at your grocery store, it's usually by the pasta/sauces area, and not by the other Jiffy products in the baking aisle.


Back to the tasty pizza at hand.


I wanted to add just a little something at the end, and truffle salt fit the bill.  A bit of truffle oil would also work just fine.  Or you could skip it all together.  It's certainly not necessary, but I'd highly recommend it.  It really added the final 'wow' factor!


Shaved Asparagus Pizza
(from Smitten Kitchen site and book)
Makes 1 full size pizza - number of servings is up to you!

1 recipe your favorite pizza dough (I recommend a Jiffy crust for ease!)
1 fresh mushroom, chopped finely
1 Tbsp shallot, chopped finely
1/2 pound asparagus
1/4-1/2 cup grated Parmesan and/or Pecorino
1/2 pound mozzarella, shredded or cut into small cubes
2 teaspoons olive oil
1/2 teaspoon coarse salt
Several grinds black pepper
1/4-1/2 tsp. dried rosemary, chopped or ground - or use fresh
Truffle salt/oil (optional)

Oven: Preheat your oven to the hottest temperature it goes, or about 500 in most cases. If you use a pizza stone, have it in there.

Prepare asparagus: No need to snap off ends; they can be your “handles” as you peel the asparagus. Holding a single asparagus spear by its tough end, lay it flat on a cutting board and using a vegetable peeler (a mandolin would also work, in theory, but she found it more difficult to do it that way), create long shavings of asparagus by drawing the peeler from the base to the top of the stalk. Repeat with remaining stalks and don’t fret some pieces are unevenly thick (such as the end of the stalk, which might be too thin to peel); the mixed textures give a great character to the pizza. Discard tough ends. Pat asparagus dry with paper towel (I noticed my pizza got a bit 'wet' without doing this).  Toss peelings with chopped shallot, olive oil, dried rosemary, salt and pepper in a bowl.

Assemble and bake pizza: Roll or stretch out your pizza dough to a 12-inch round. Either transfer to a floured or cornmeal-dusted pizza peel (if using a pizza stone in the oven) or to a floured or cornmeal-dusted tray to bake it on. IF you're using a Jiffy crust, pre-bake the crust as directed (at 425 degrees). 

Sprinkle pizza dough with Parmesan/Pecorino (save a bit for the top) and chopped mushroom, then mozzarella. Pile asparagus on top. Top with remaining Parmesan/Pecorino. Bake pizza for 10 to 15 minutes, or until edges are browned, the cheese is bubbly and the asparagus is lightly charred. Remove from the oven and immediately sprinkle truffle salt or oil, then slice and eat.

Grilling
We have this wonderfully long weekend ahead of us that usually involves some serious grilling.  If you're so inclined, this would likely be perfect for that!  Throw the whole dough down on an oiled grill and let it cook for a few minutes on the underside. Pull it off with tongs, flip it out onto a plate and pile the toppings on the grilled side, before sliding the raw side back onto the grill. Grill the pizza with the lid down for a few minutes, or until everything is bubbly and brown.  

Enjoy!